24 July 2016
Solo
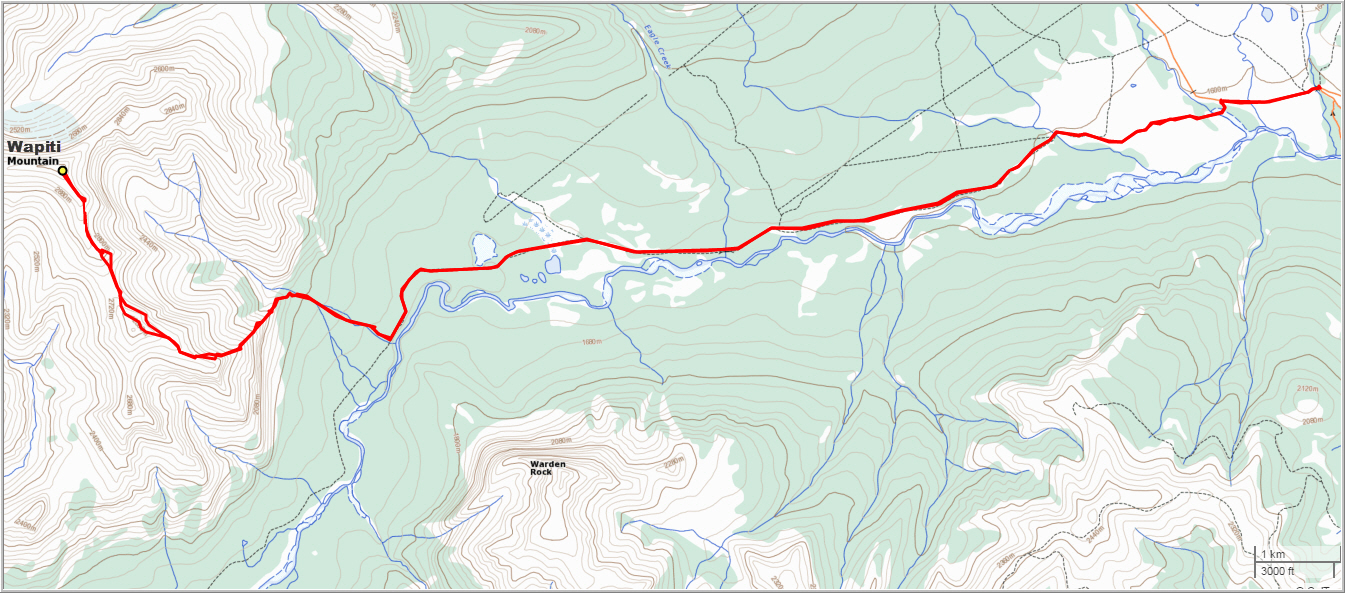
At just over 3000 m, Wapiti Mountain is one of the highest in the Ya Ha Tinda area and forms one of the two “pillars” (together with Warden Rock) of the entrance gate to Banff National Park. I had come across a couple of trip reports by two different parties (including the one by Steven Song) who had both taken the same exceedingly long route up this peak via the backside: first along Banff trail to Tyrell Creek and then up the long SW and W ridge – a whopping 56 km return! This entailed either breaking up the trip into two days and spending a night in a tent/bivy en route, or embarking on a tour de force to make it within a day. I didn’t fancy either, so I decided to scope out a possible route up the SE and S ridge, which would theoretically be much shorter and easily doable in a day.
I started off on a beautiful and hot Sunday morning at the not-so-early time of 830 am from the Bighorn Campground parking lot. As on my last trip in this area when I cycled the approach to Warden Rock, I brought my bike again to save time on the first 12 km section. The so-called “Banff Trail” is a gravel road that leads along the Red Deer River all the way to the entrance of Banff National Park, and it’s ideal for biking even though some sections can be a bit rough, especially at the beginning. It took me about 1.5 h from here to the ascent drainage I had identified on satellite images – a large “plume” of rock that comes off the valley to the SE of Wapiti and widens as it drains into the Red Deer River. Where the first (eastern) branch of this drainage intersects the gravel road, just before the Outpost at Warden Rock, after about 12 km of cycling, I ditched my bike and hiked up the right side of the drainage. There was a very good trail at the beginning, but it veered off to the right after a few hundred metres, so I followed the grassy embankment through light forest all the way to the start of the steep SE ridge.
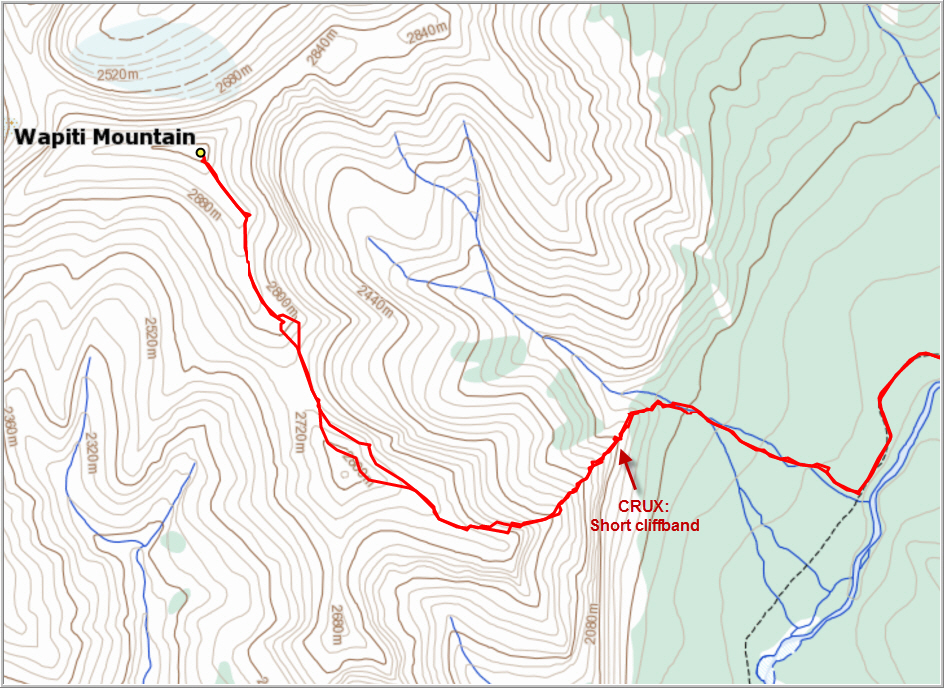
Now this is where I started gaining elevation really quickly. The SE ridge is one continuous, unrelentingly steep slope intersected by several cliffbands. From below, I couldn’t really see if there was a way to scramble through them, but it didn’t look impossible, so I decided to check it out. The very first part to about treeline was easy and quite enjoyable on grassy terrain. Then my progress was abruptly stopped by a fairly sizeable cliff that seemed to wrap around both the right and left side of the ridge. This craggy, light grey band of rock appeared to also form part of an impressive waterfall that was in the main gully a few hundred metres to my right. As is so often the case with steep, craggy breaks in a mountain, this cliffband actually represents an ancient reef as evidenced by large solution pores (pockets) and corals embedded in the rock. I found a weakness at the crest of the ridge that led to a short ledge to climber’s left from where a short, steep scramble led over and on top of the cliffband. Higher up there were several more steep cliffs, but all could be easily bypassed on climber’s right. Near the top of the SW ridge I came to a huge vertical rock buttress. To the right of the buttress, there appeared to be a route up to the top of the south ridge, albeit with much tedious rubble in between. So I started traversing this rather annoying scree slope, angling diagonally up and to the right. This was probably the worst part of the whole trip – the scree was loose and the my feet weren’t happy having to stomp through large, unstable and sharp chunks of rock. There were also a few smooth slabs of rock that required a little routefinding to circumvent. I was quite surprised to find not a hint of a trail here – neither man- nor animal-made – which worried me a bit as there was always the possibility of getting stuck in a dead-end. To my delight, I made it all the way to the crest of the south ridge, where I now had views of Banff National Park to the west for the first time.
At this point, I had attained a total vertical elevation gain of only 900 m. It is hard to believe that I still had another 900 m to go! The south ridge of Wapiti Mountain looks deceptively easy. It’s certainly easy in terms of technicality, but it’s a long hike with lots of ups and downs in between. On the way to the summit I ascended all of the highpoints, but on the way back I opted to go around them on the east side, involving much sidesloping. It seems I still haven’t learnt my lesson, but again my conclusion is that it’s better to stick to easier, more pleasant terrain on the ridge crest and deal with additional elevation gain, than awkwardly sideslope around these highs, which can be equally energy-consuming, but more importantly it’s also much more enervating!
Just before the summit I enjoyed some good scrambling and routefinding through several short cliffbands (easy to moderate). Again, I was a bit puzzled by the fact that there wasn’t even a faint trail, not to mention any cairns, to be found anywhere along this ridge (I built a few to facilitate my return). The original summit register left by Rick Collier in 1991 unfortunately was soaking wet, but the entries were still legible: only three more ascents had been recorded since then, including the ones by Steven and Ben, and Kevin and Raff.
I enjoyed a wonderfully relaxing break at the summit cairn and took a hundred pictures as usual before heading back down. For a brief moment I contemplated trying out a different descent route, for example by heading down the east slopes closer to the summit… but I’ve had lots of bad experiences with “alternative descent routes” in the past and therefore decided to stick to the route I came up. There may be other and perhaps even easier routes up this mountain from the valley to the SE, but there are also quite a few cliffs and steep gullies that are unseen from above and that can get you in real trouble if you’re not careful. The advice here certainly is “if you’re trying out a new route and find a way up, make sure you take the same way down”.
The ridgewalk back was really enjoyable with plenty of sunshine and clear blue skies all around. With the exception of sidehilling around the big “bump” on the south ridge, I took exactly the same route back down. Warden Rock, the mountain just to the south, looks really quite imposing from this angle. To the west, a vast sea of largely unknown mountains extends, allowing one’s imagination to run wild as to all the scrambling opportunities that exist in this region.
On the way down the unpleasant scree slope to regain the SE ridge, I briefly had a scary moment when I narrowly avoided a falling rock the size of a car tire. As I was sliding down some loose scree, a pile of rocks above me loosened up and started to slide, leading a large chunk of rock to collapse and come whizzing down… I heard the deep “thump” of the rock breaking off and intuitively jumped to the side. It flew past me only metres away one second later. I stood there, my heart pounding, holding my breath and watching the huge rock carve out holes in the ground with every bump on its long tumble down the steep slope into the valley below. This situation was certainly a reminder that even though sliding on loose scree can be a fun and quick way down a steep slope, this type of terrain can quickly get dangerous if the whole scree slope starts to move, especially the rock above you. If that happens you better get out of there fast and exit to the side to avoid potential rock fall from above. Scree “avalanches” can easily loosen up bigger rocks above, and it only takes one unstable chunk to come raining down on you and it’s game over.
The rest of my trip was simply retracing my steps along the SE ridge, including the short downclimb through the reef cliffband. I took my time here and it wasn’t as bad as I had expected. The bike ride back to the campground only took me an hour this time around – probably because it’s mostly downhill and also because I decided to bike through the shallow waters of Scalp Creek at the end instead of taking my boots off.
On the whole, this was a hugely enjoyable trip up a big mountain and I was really happy that my “shortcut route” up the SE and S ridge worked out so well.
For a detailed map of the area, including all existing trails and many possible scramble routes, see the Ya Ha Tinda & Surroundings Trail Map on Avenza (a free mapping app for offline navigation and tracking). The map is also available in print at MapTown or GearTrade.

DISCLAIMER: Use at your own risk for general guidance only! Do not follow this GPX track blindly but use your own judgement in assessing terrain and choosing the safest route.
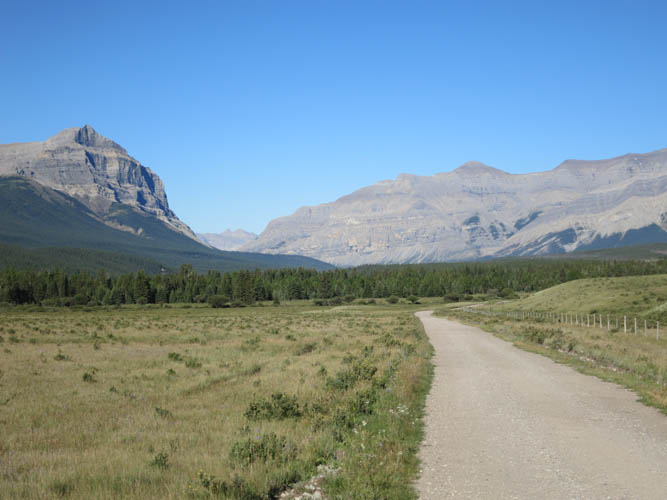
The gravel road (“Banff Trail”) leading west towards the National Park. Warden Rock on the left, Wapiti Mountain on the right. The summit of Wapiti is just to the right of the photo outside the field of view.
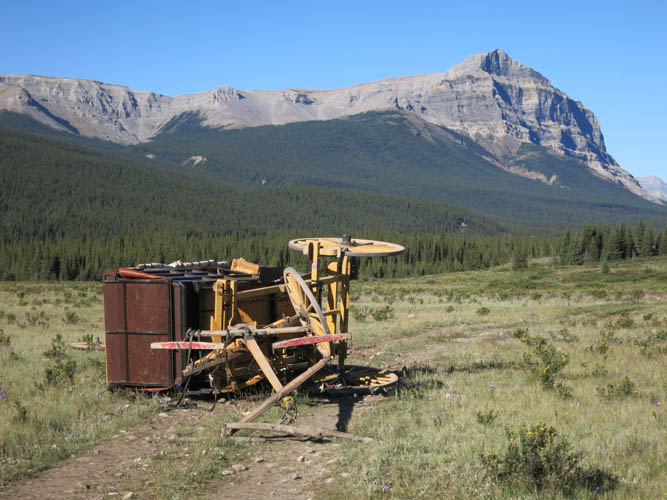
Apparently, the horses pulling this carriage were going too fast on this bumpy section of the road.
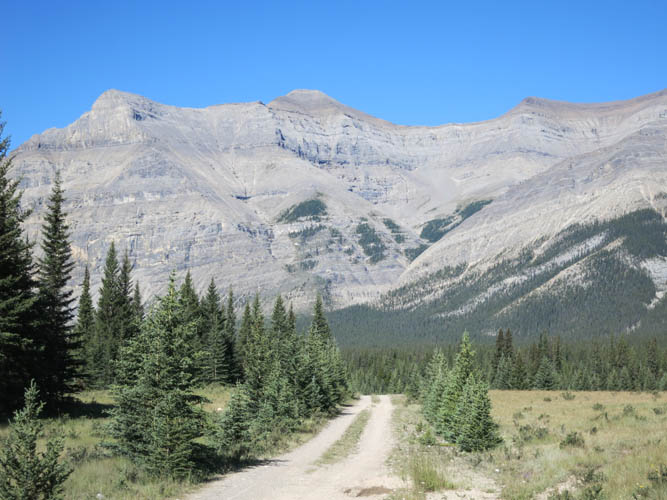
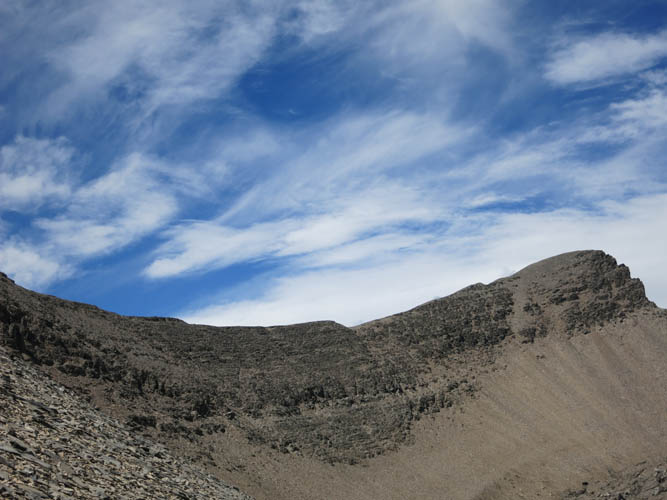
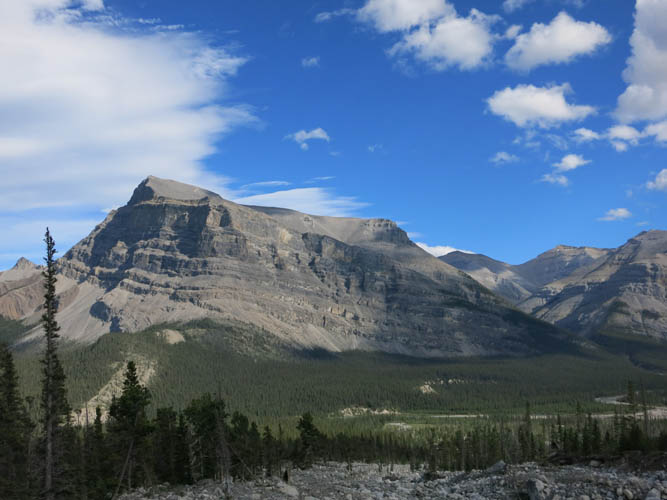
Approaching the objective.
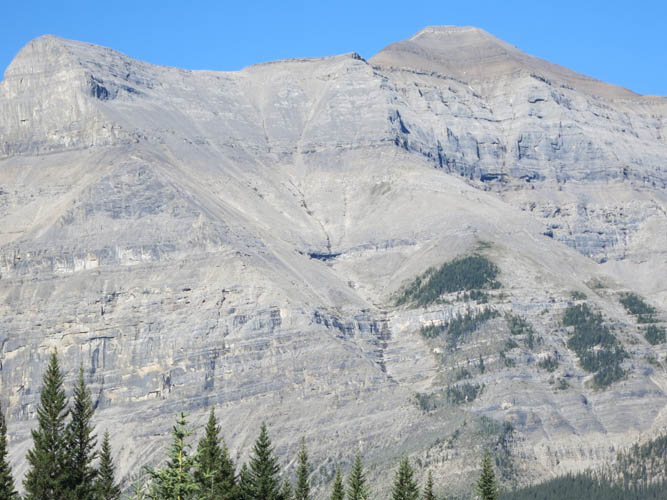
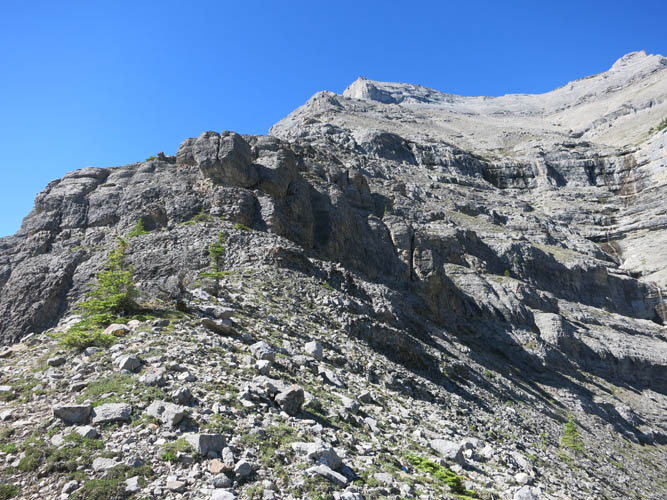
Close-up of the ascent ridge and scree traverse to the top of the south ridge.
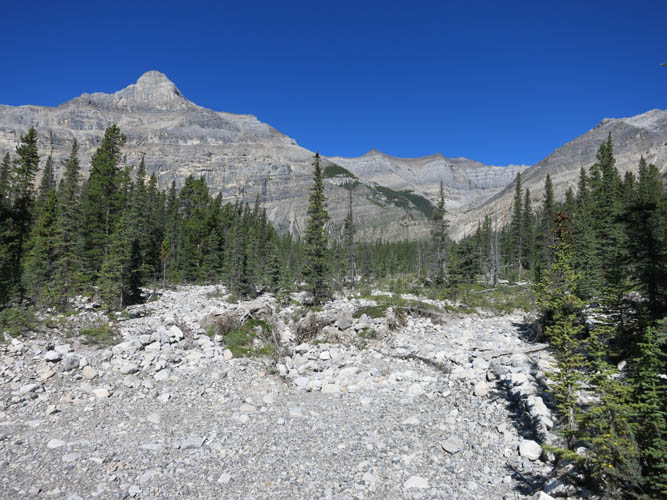
Hiking up the drainage. Wapiti’s summit is out of sight far in the back.
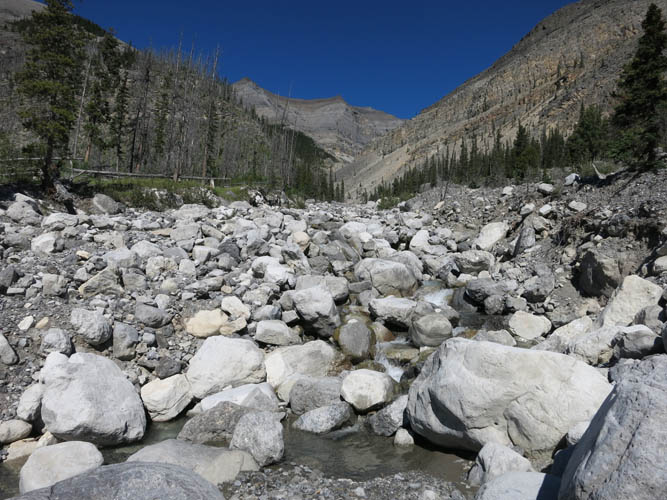
Higher up, the creek that feeds the drainage carries refreshingly cold water. I crossed the creek here and then went up the steep treed bump on the left.
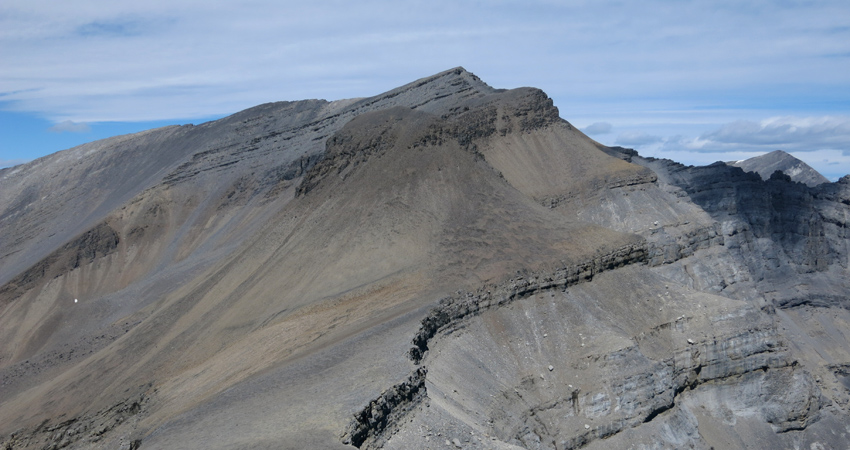
Shortly after leaving the trees behind me, I encountered the crux of the trip. I found this cliffband is best tackled head-on, just left of the large cubic block sticking out.
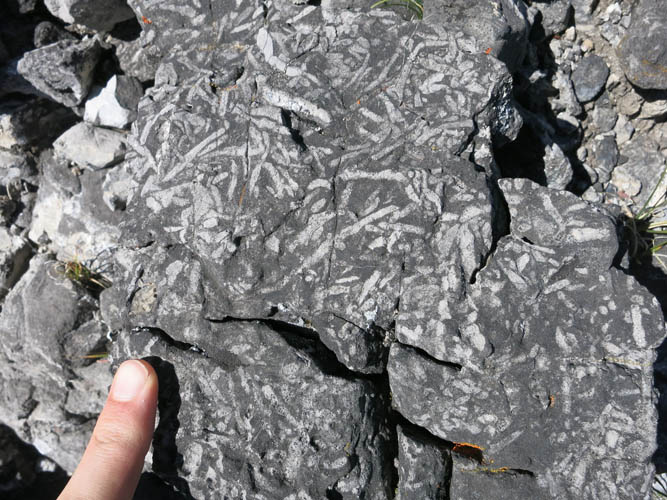
Corals abound in this ancient reef complex.
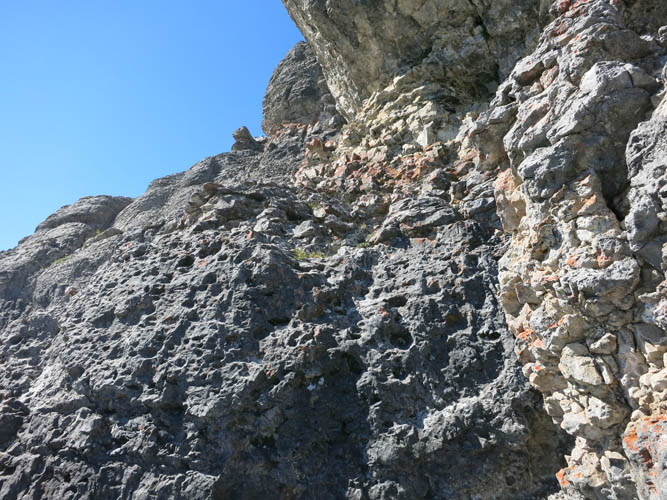
Solution pockets offer good holds on this short but steep and moderately exposed scramble.

A waterfall has formed along the same cliffband in the gully just to my right.
Looking back along the SE ridge. The scrambling here is fun and easy. All major obstacles can be avoided on climber’s right.
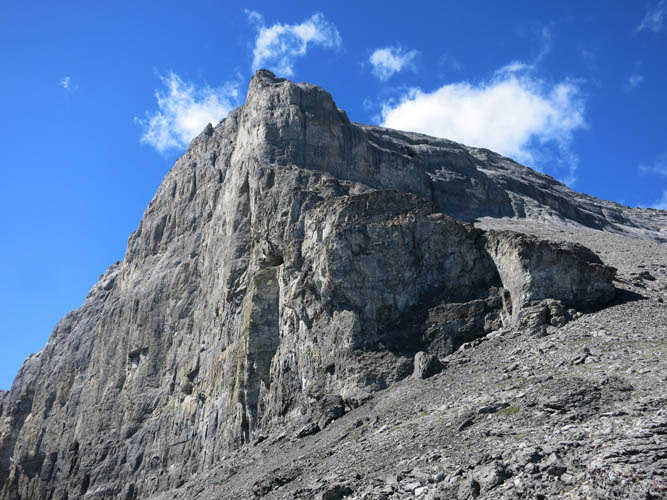
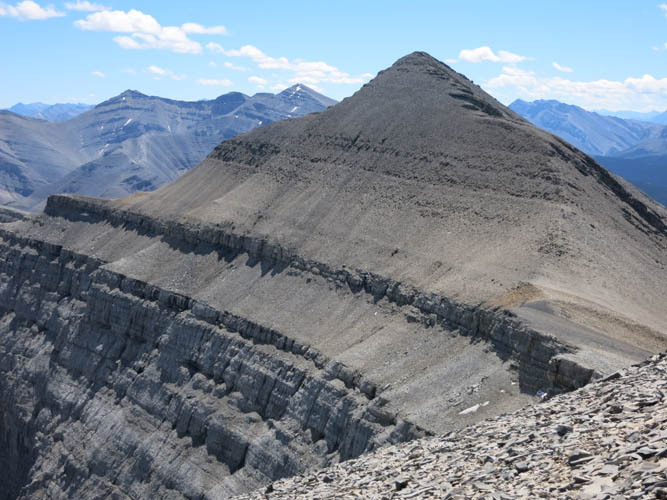
An impressive rock buttress shows up just before reaching the main ridge.
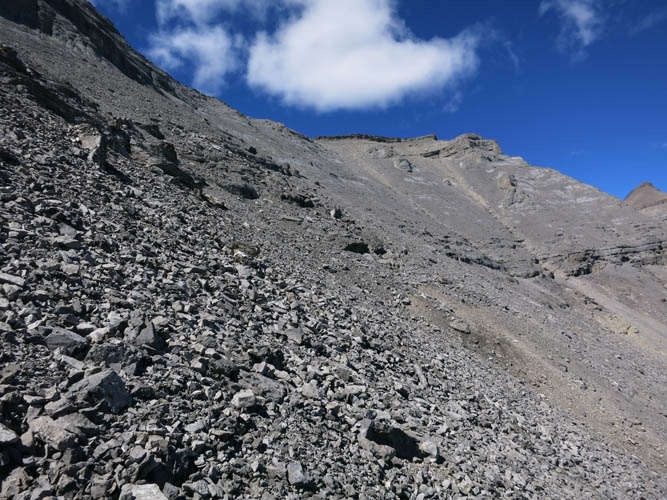
A traverse led me diagonally up (right) to the south ridge. The loose scree is definitely not fun, but it’s fairly straightforward.
Looking back from the top of the south ridge, this is where I just came from.
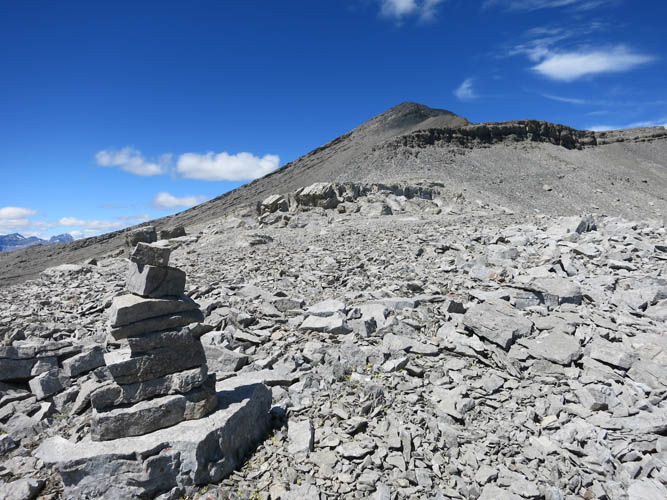
I built a rather flimsy cairn to help me find this point on the ridge on my return.
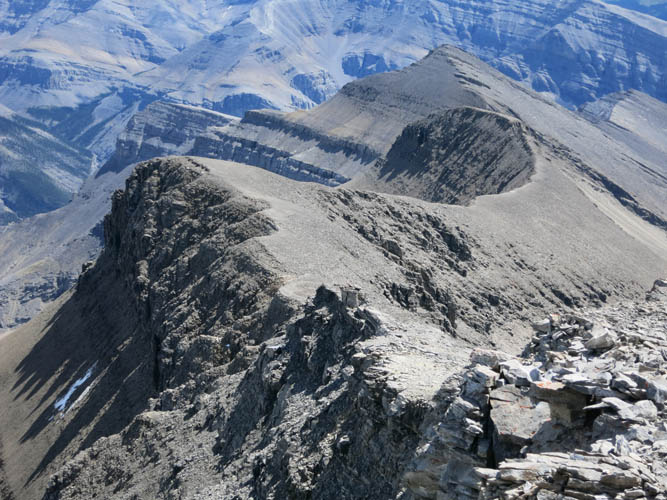
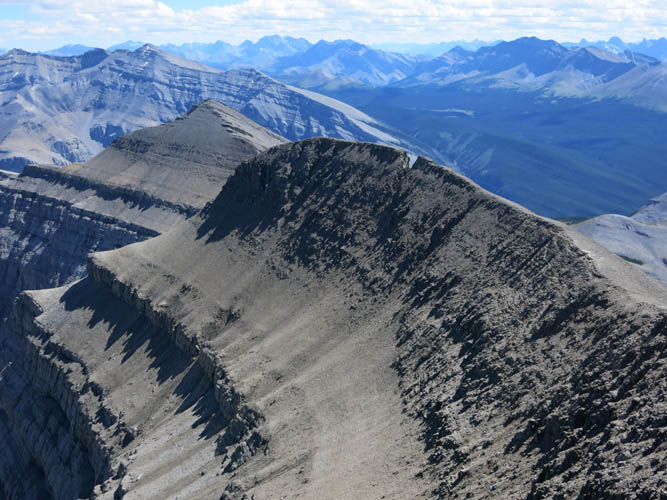
This highpoint along the south ridge is basically a big pile of brown shale.
Beyond the brown shale pile, there are several more ups and downs along the ridge and the summit is still far away!

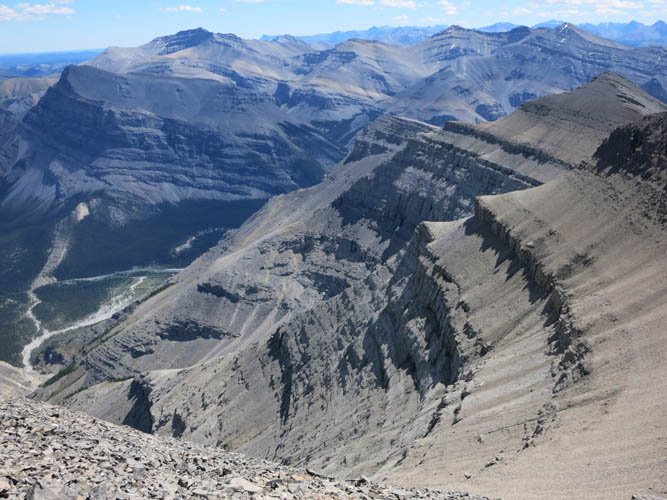
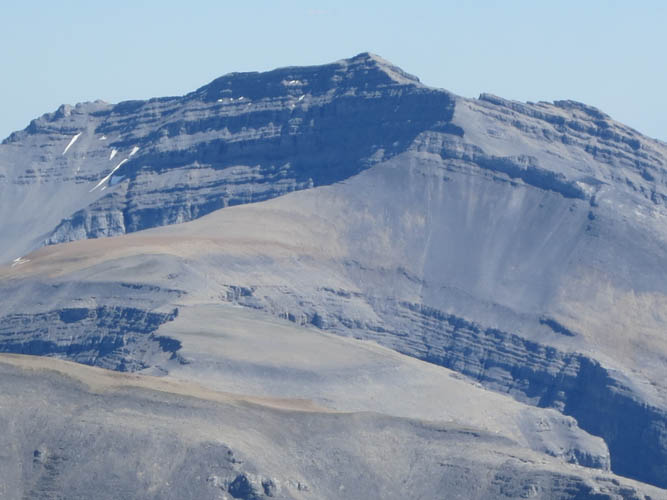
A view of Cataract Peak to the west. The brown ridge in the middle is part of Mount Tyrrell.
Looking back at the brown shale pile. You can either hike over it or traverse over broad scree on the left (east) side just above the upper cliffband.
A sky painting above the south ridge.
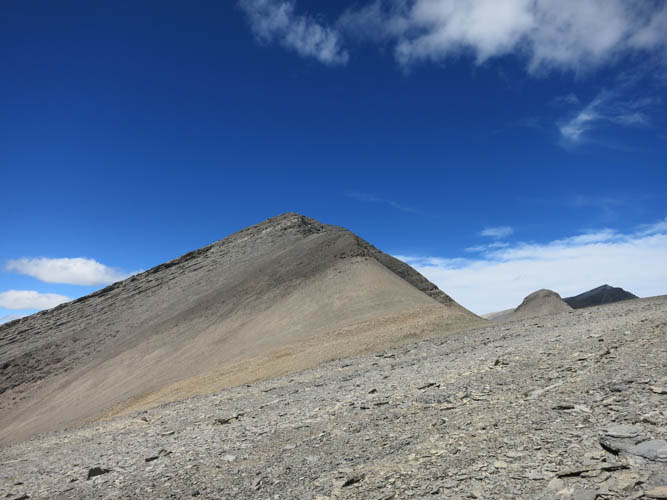
This section of the ridge is pretty crumbly and narrow in places. One deep notch requires a short but easy scramble. The summit of Wapiti is in the distance.
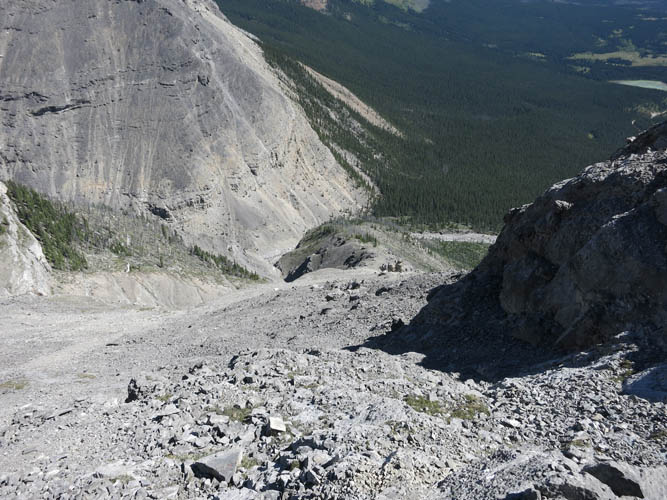
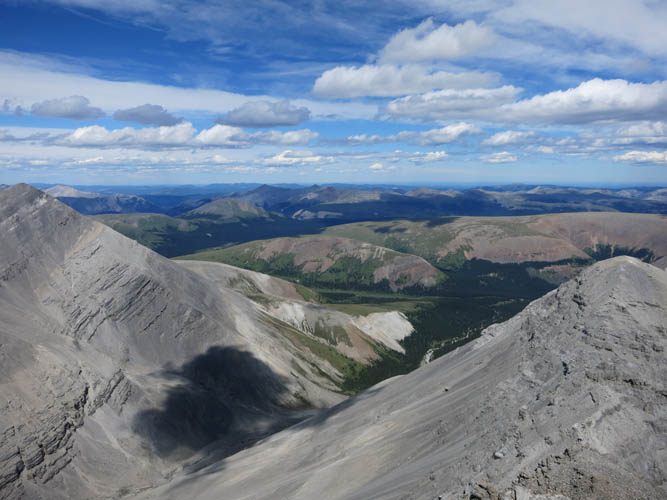
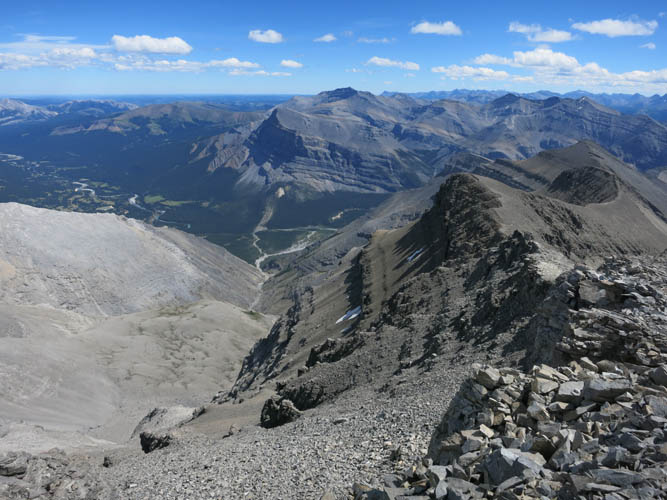
A view from the ridge back down to the southeast.
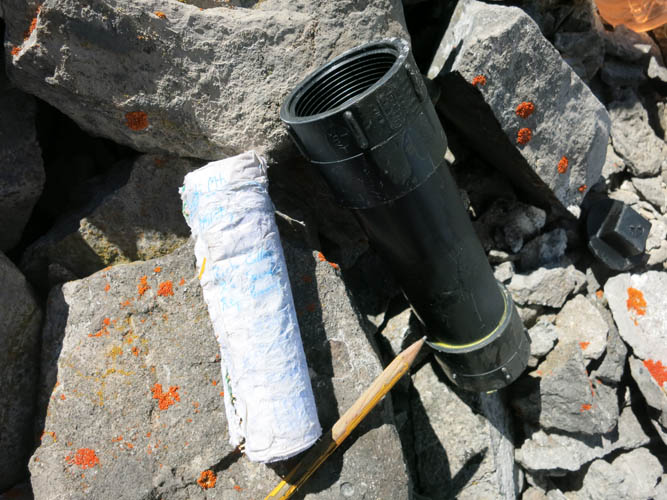
Summit register.
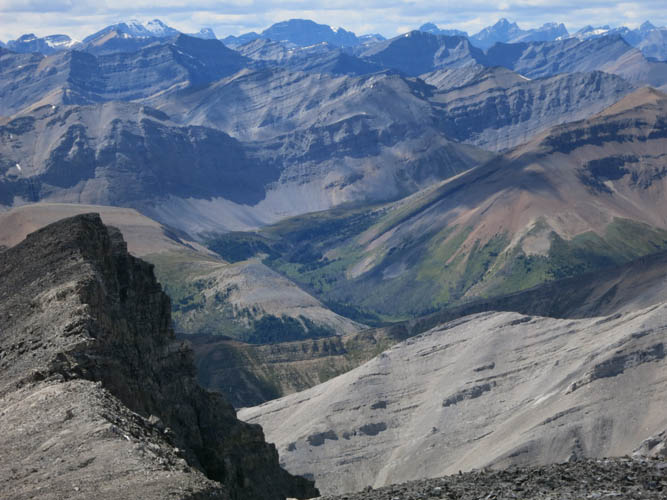
Beautiful vistas to the NW with Scalp Peak in the far distance.
Warden Rock (left) and Barrier Mountain (just right of centre in the back).
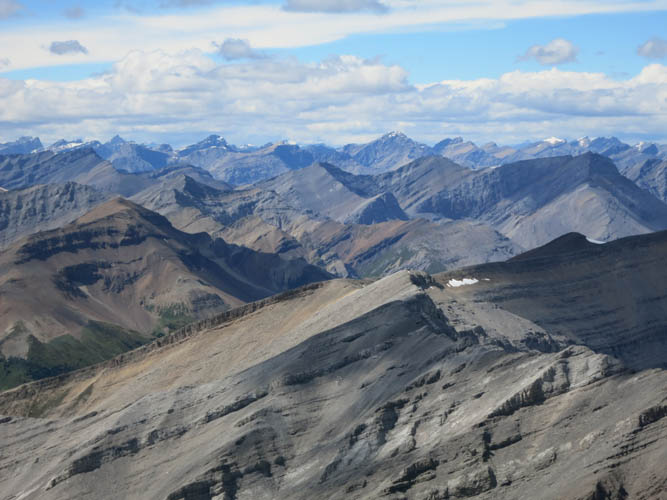
Many peaks unknown to me to the NW.
So much to explore!
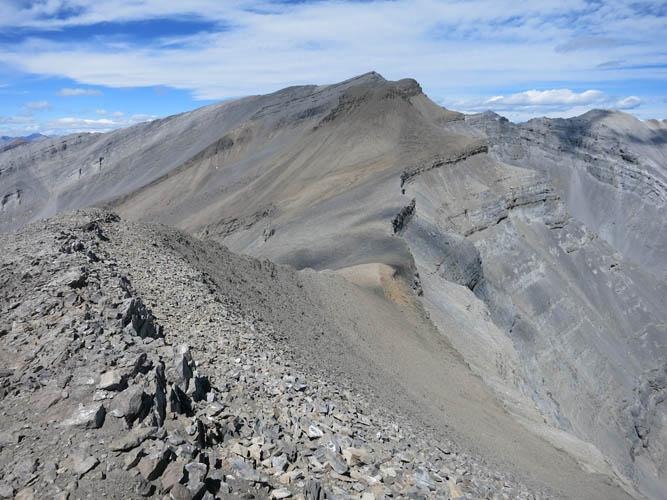
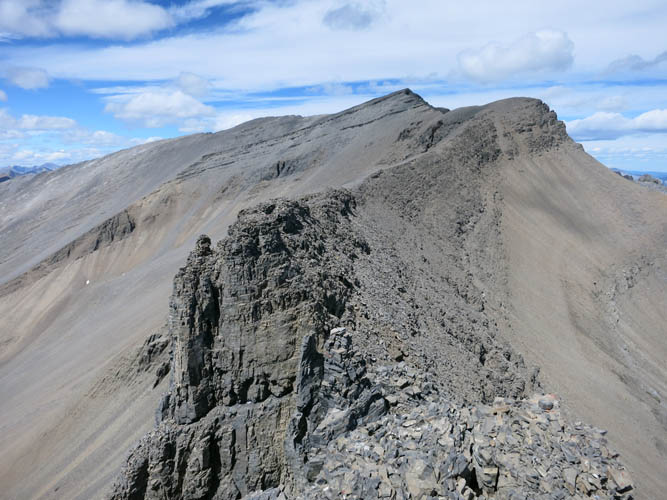
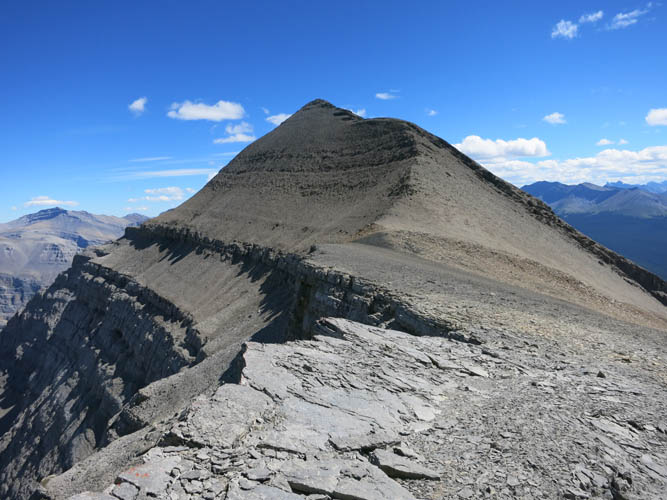
From the summit, the south ridge that I came up looks like a never-ending series of ups and downs.
Close-up of the south ridge.

A crinoidal grainstone that I found on the summit. Crinoids the remains of ancient sea lilies!
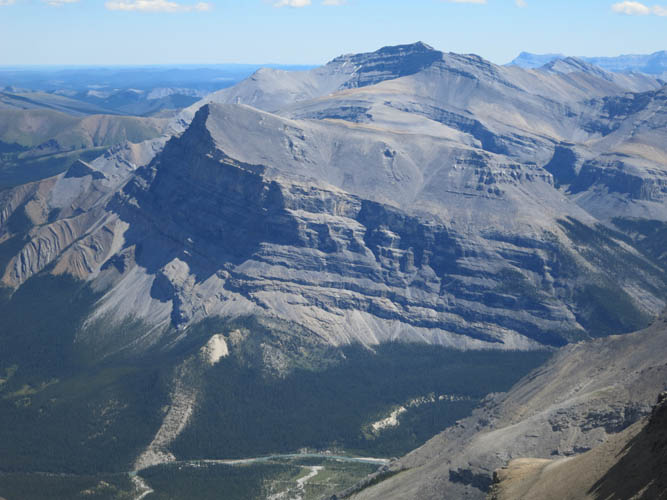
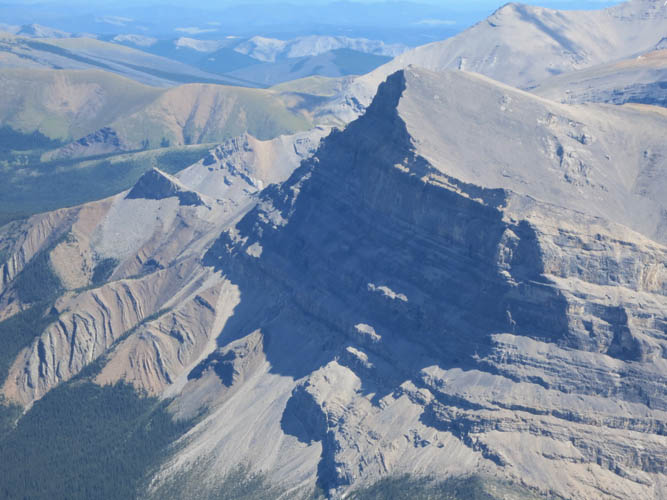
A zoomed-in view of Barrier Mountain to the south.
And an interesting perspective of Warden Rock.
On my way back along the crumbly ridge – the v-shaped notch shows up quite well from this vantage point.
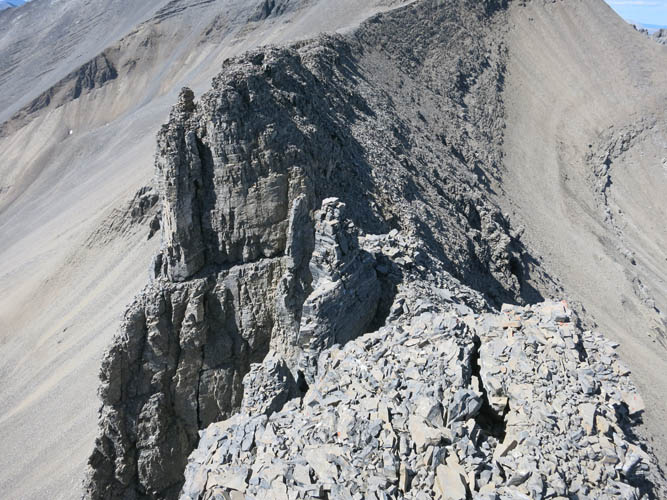
Scrambling around the notch.
I stayed on this level and traversed on the left (east) side of the big brown shale pile to avoid having to re-ascend this bump.
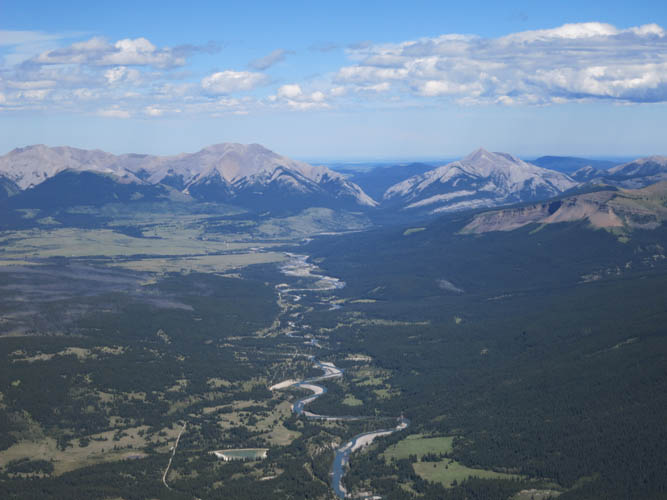
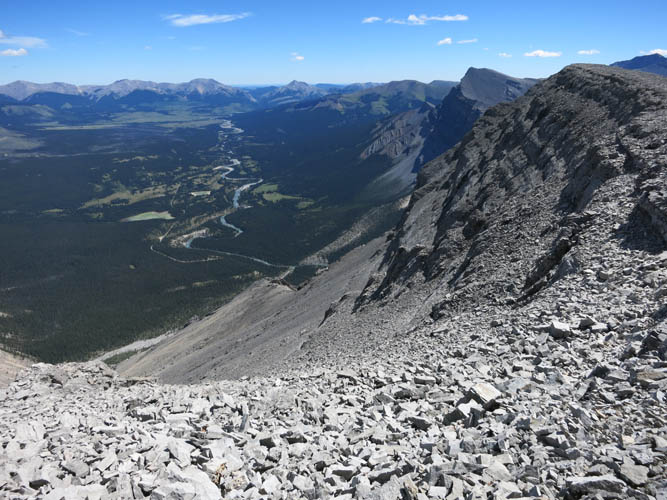
The broad expanse of the Ya Ha Tinda ranch area opens up below me. In the distance are Evangeline Peak, Eagle Mountain and Maze Peak (from left to right).
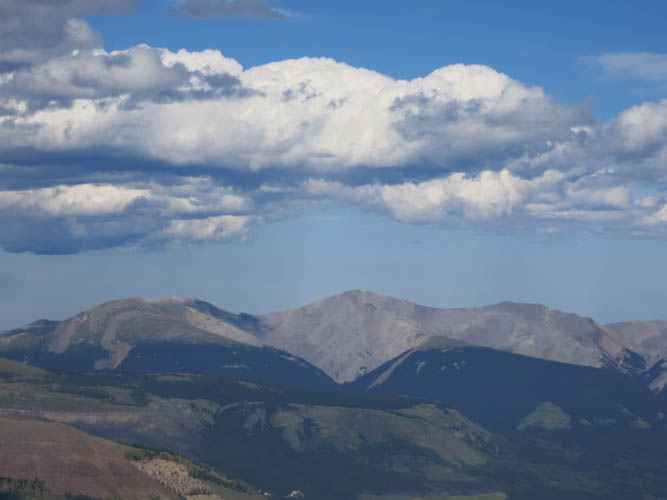
Interesting cloud build-up above Scalp Peak.
A last look at Warden Rock from the access drainage.