Ya Ha Tinda, AB, Canada
23 November 2019
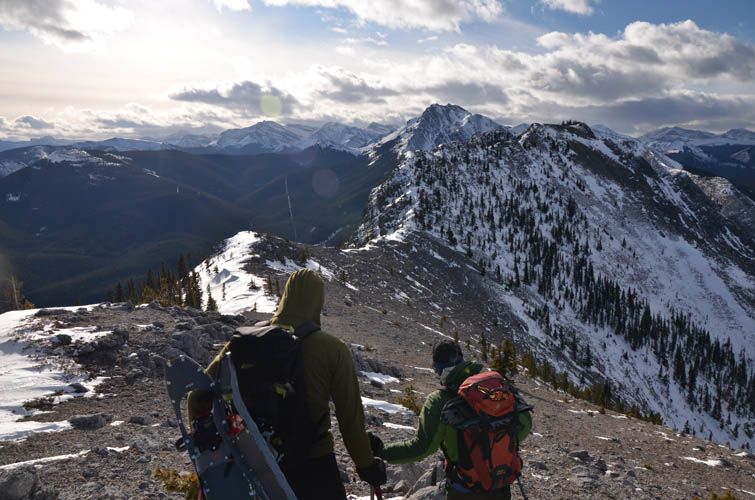
With Trevor & Richard
Pleasant hike on an unknown ridge
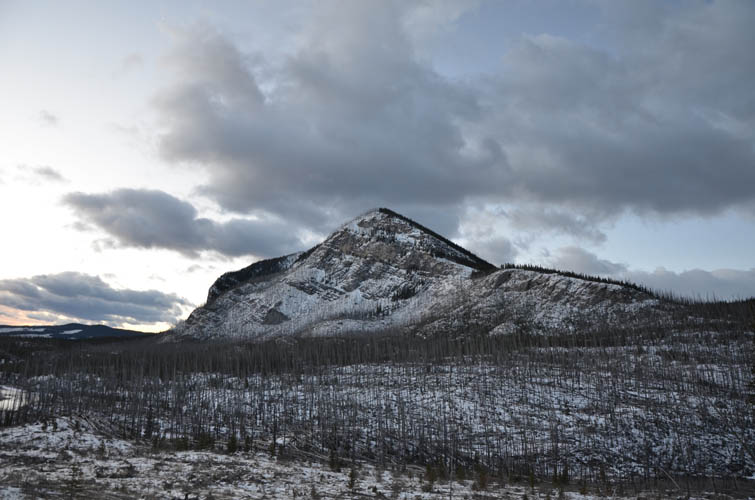
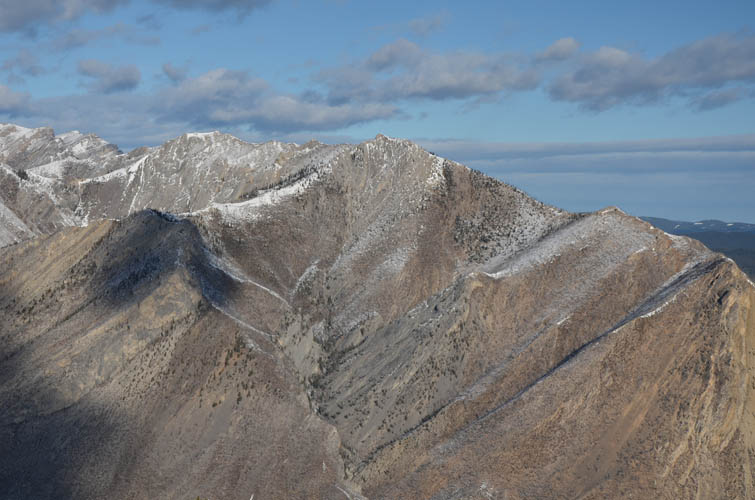
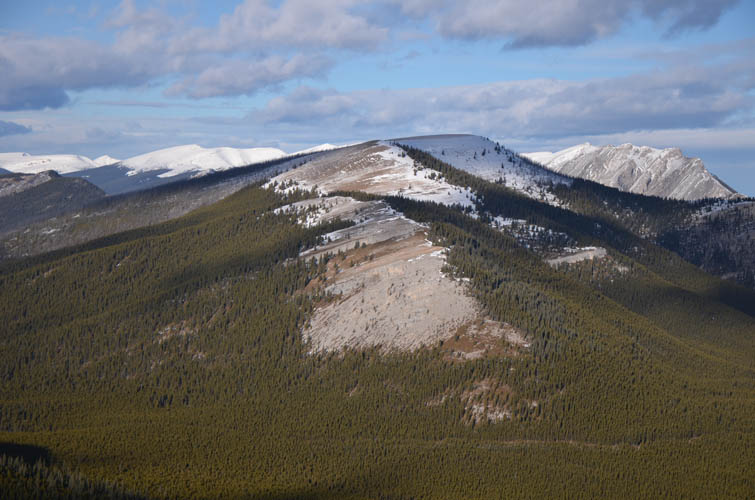
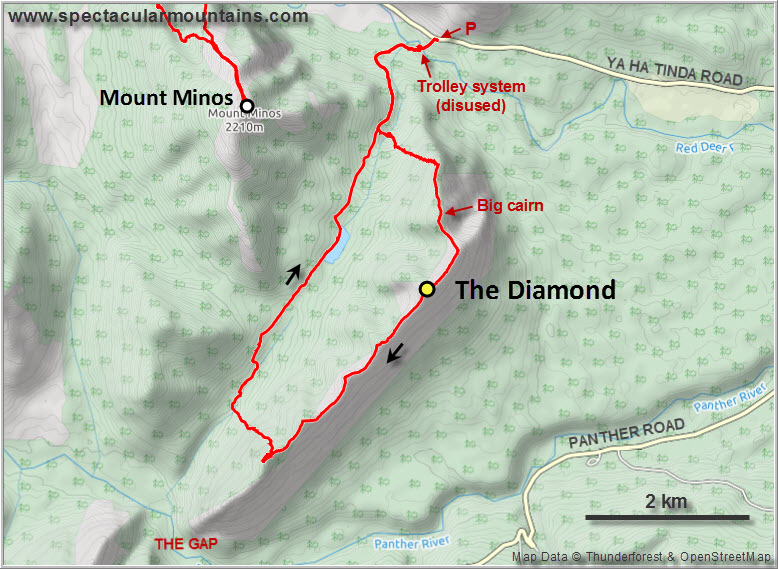
This long, almost straight NE-SW trending ridge has caught my eye on several occasions in the Ya Ha Tinda area. It’s treed almost all the way to the top, but the gently undulating crest is mostly bare rock and seems to offer a great opportunity for a pleasant ridgewalk – which is exactly what it turned out to be.
The ridge is unnamed on all of the maps I could find of the area, and even consulting with local park wardens and staff at the Panther River Lodge didn’t yield any results. I always wonder why there are so many peaks and ridges that seem to be unnamed in the Rockies – ancient peoples have lived and travelled in these areas for centuries and surely would’ve had their own names for these features. After multiple phone calls to various government offices and extensive research on- and offline (I even went to Calgary’s Central Library), my efforts finally paid off… A friendly lady at AB Environment and Parks in Sundre who knows the area well told me that locals refer to the ridge as “The Diamond”, which was later corroborated by other folks I met in the area. Interesting…
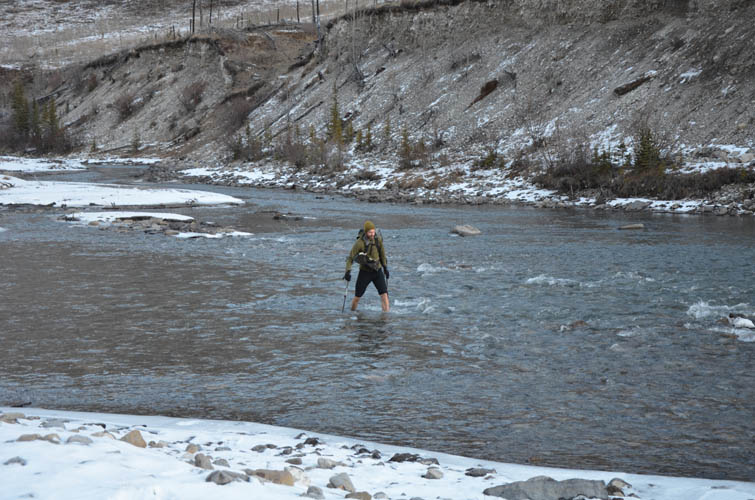
Our proposed route mapped out on satellite images worked out just as planned. The main deterrent for most people will be crossing the Red Deer River at the beginning and end of the hike. Water levels are generally quite high in the summer here, making fall and winter the best time to make the crossing. There is a narrow track that runs down to the river from the Ya Ha Tinda gravel road (driveable with a 4WD), where an old cable trolley system stretches across the water. This is probably the best place to descend the embankment and cross the water, which was up to calf-deep and excruciatingly cold when we waded it in the early morning. Trevor was smart enough to bring fisherman’s style waders, an investment I’m now seriously considering for future river crossings!
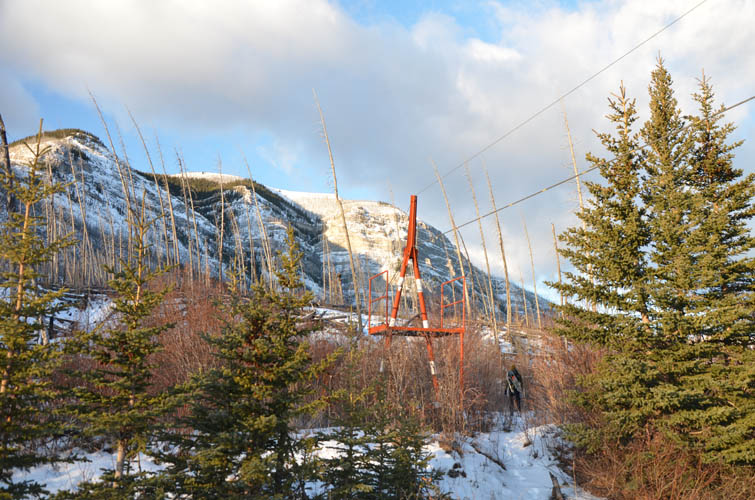
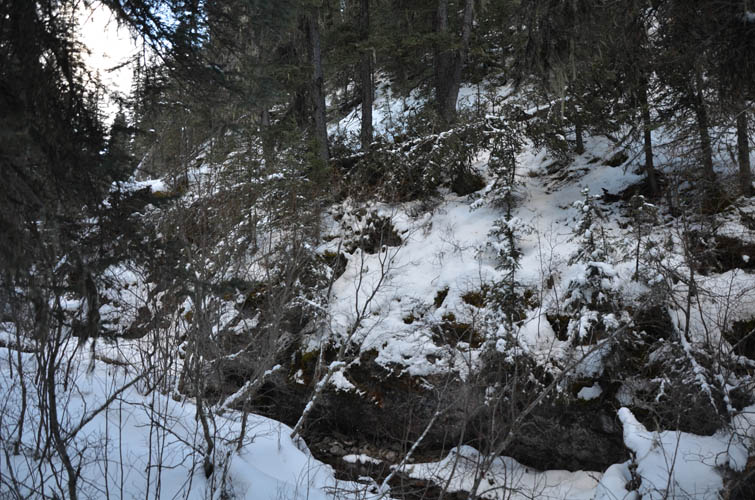
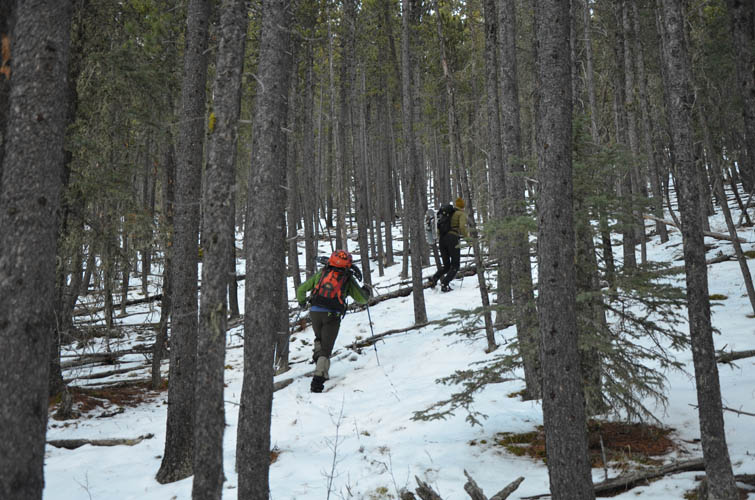
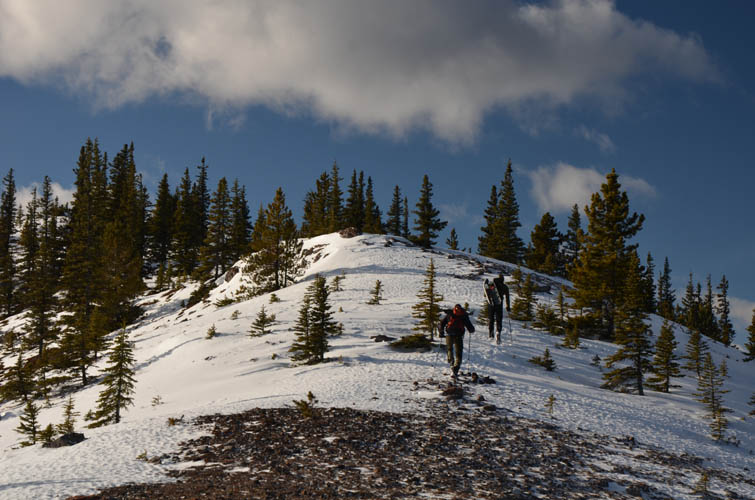
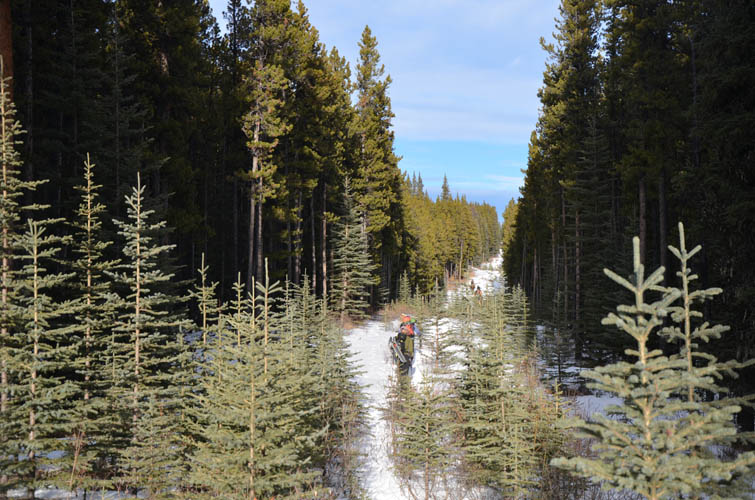
On the other side a horse trail leads through deadfall to an old exploration road that winds its way up and into the small valley between Mount Minos and The Diamond. We left the track after about 2 km and entered the forest to our left. The only challenge (the crux of the day really) was the narrow creek valley we had to overcome right after entering the forest. The sides were pretty steep and getting in and out of the creek involved some awkward moves, but we knew we didn’t pick the best spot and there must be better places to cross a little further up the creek. Past the creek, it was a simple plod through light forest all the way to the ridge top.
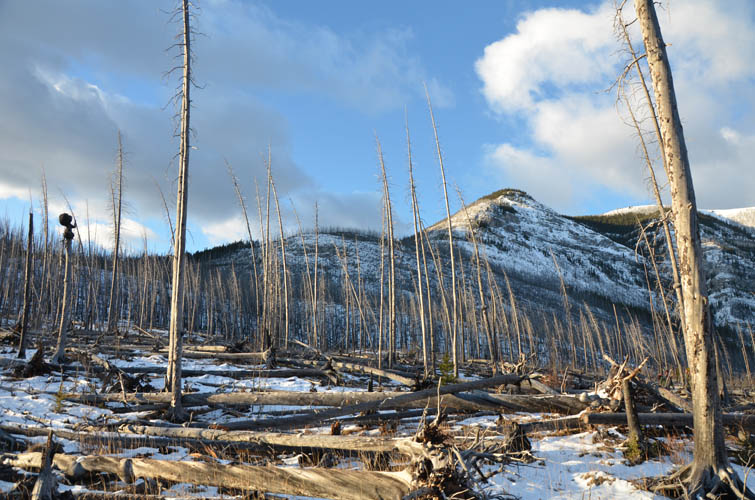
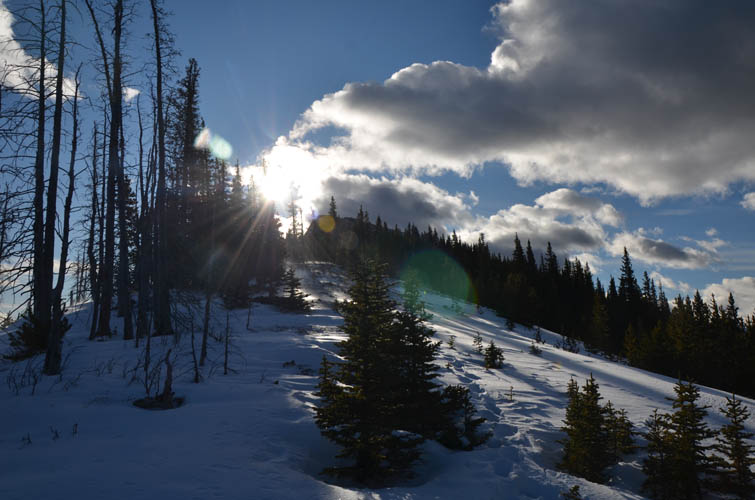
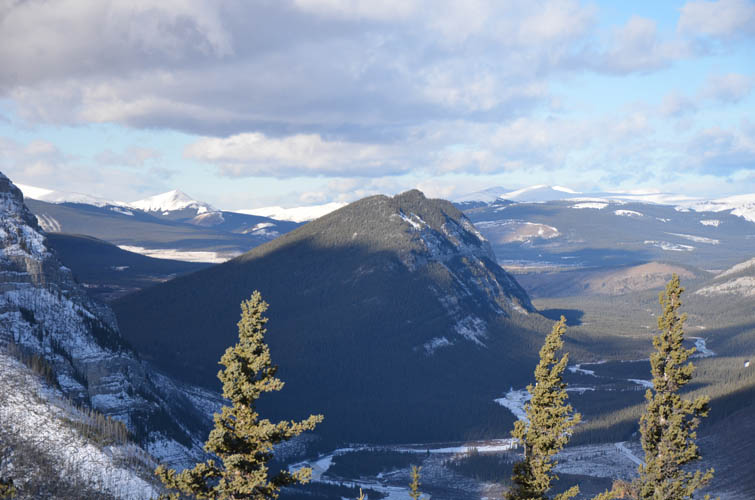
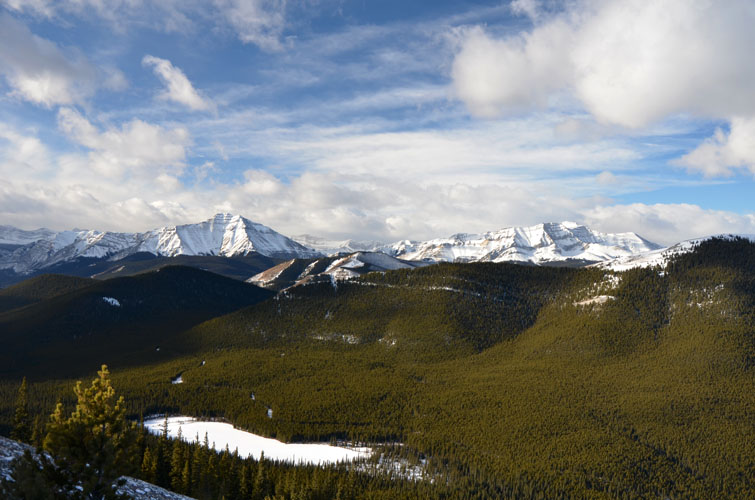
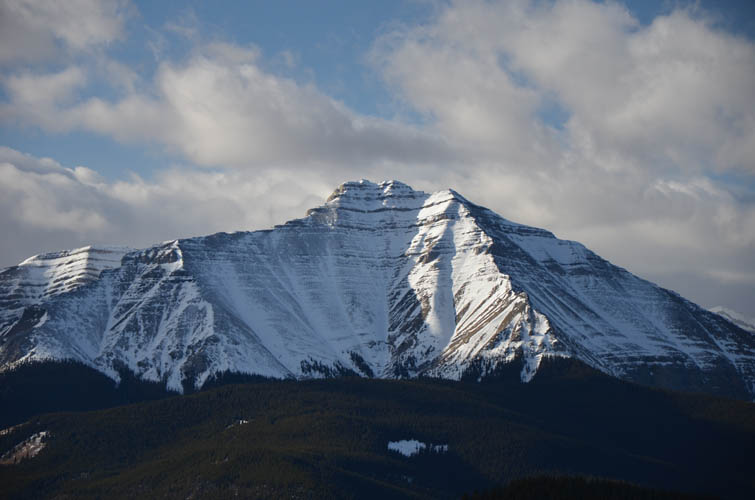
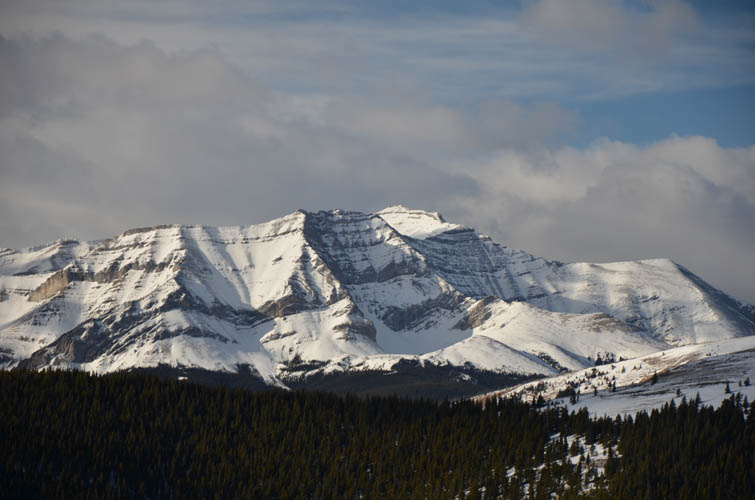
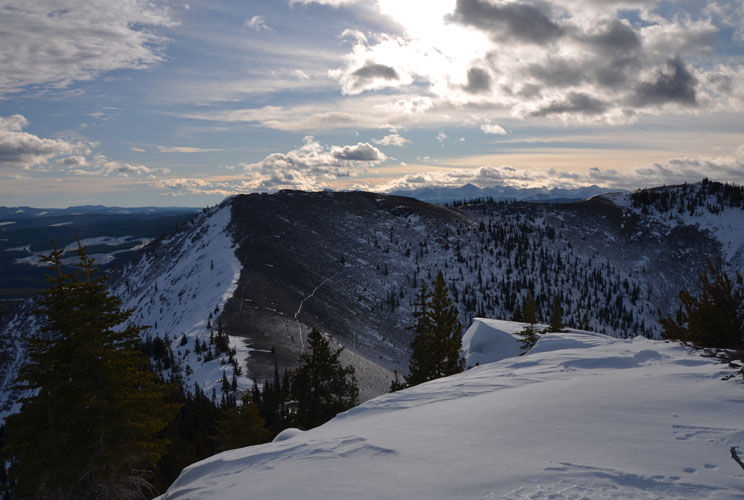
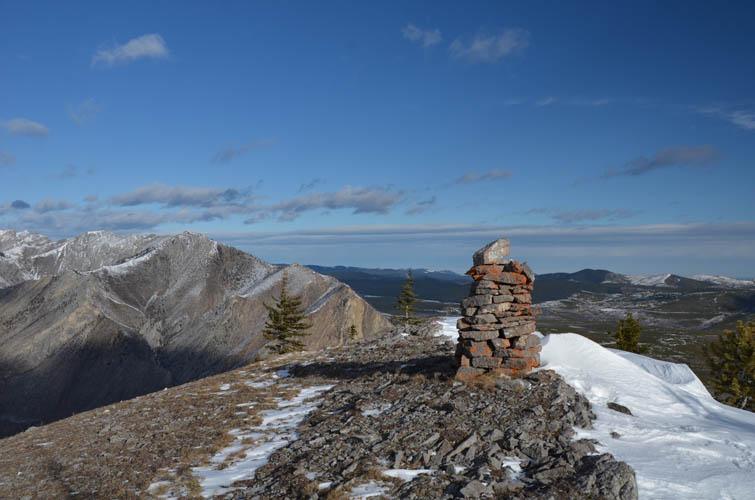
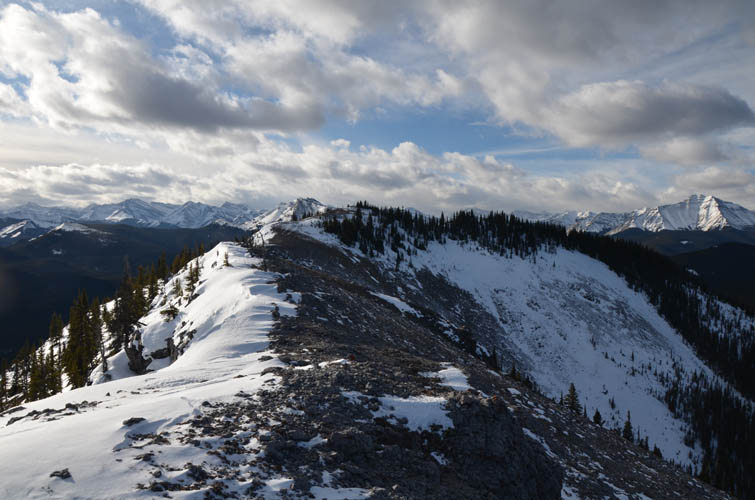
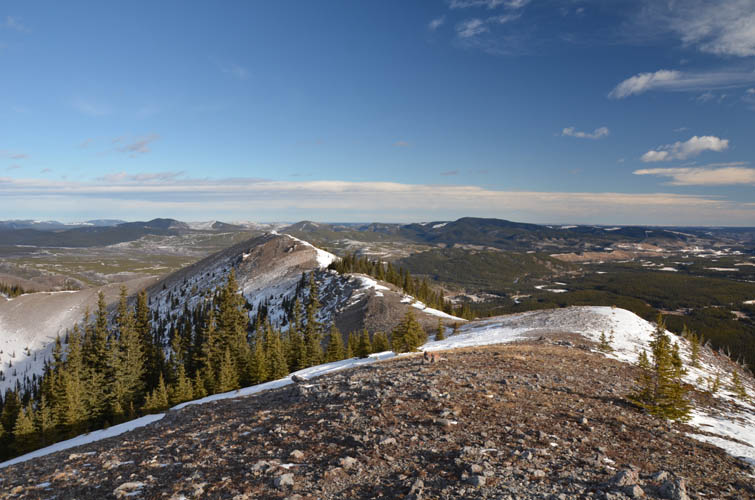
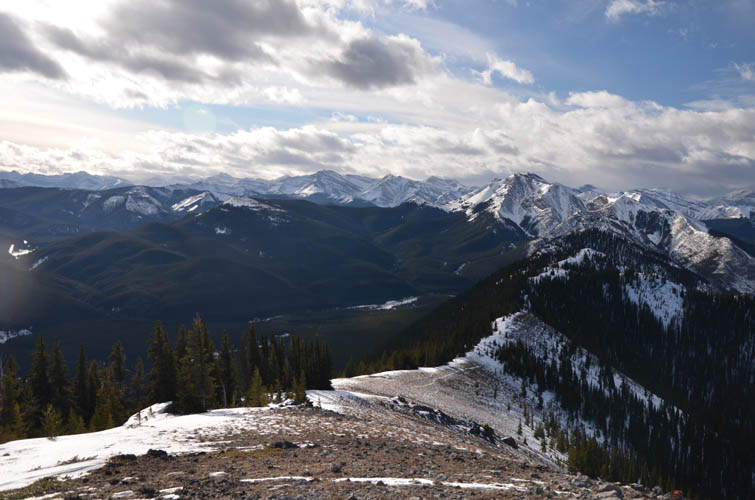
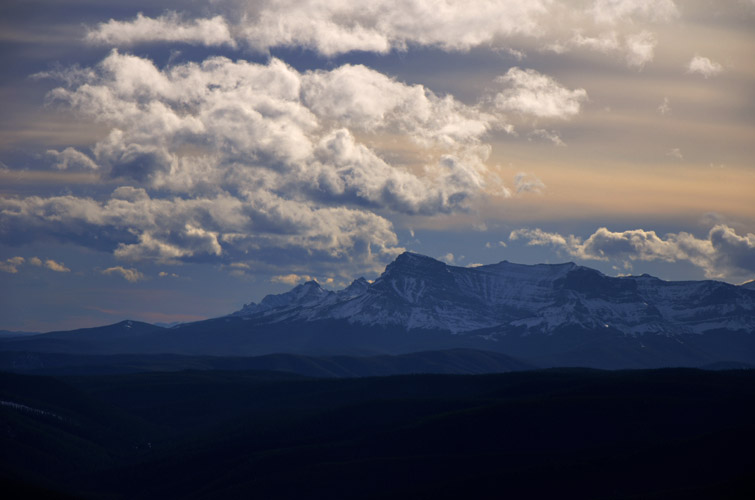
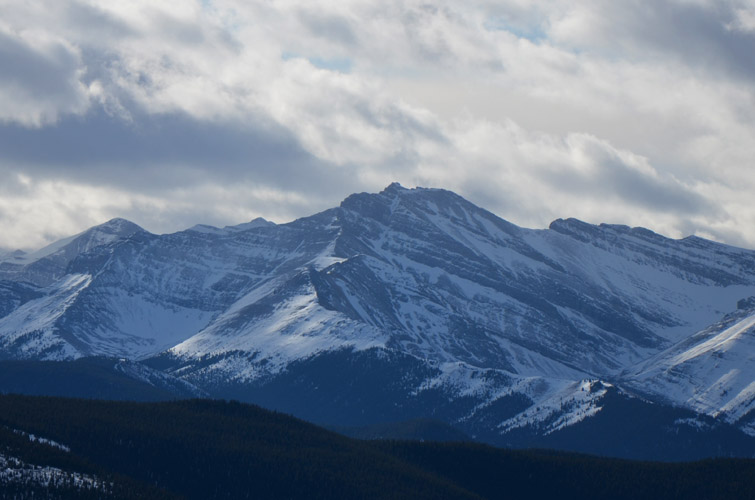
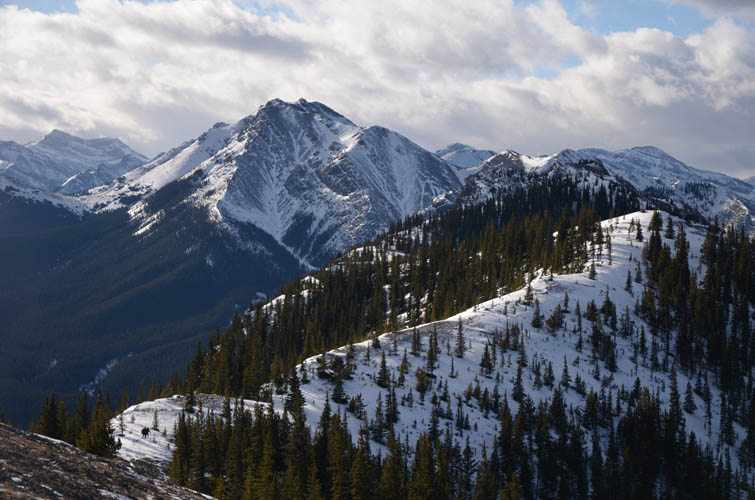
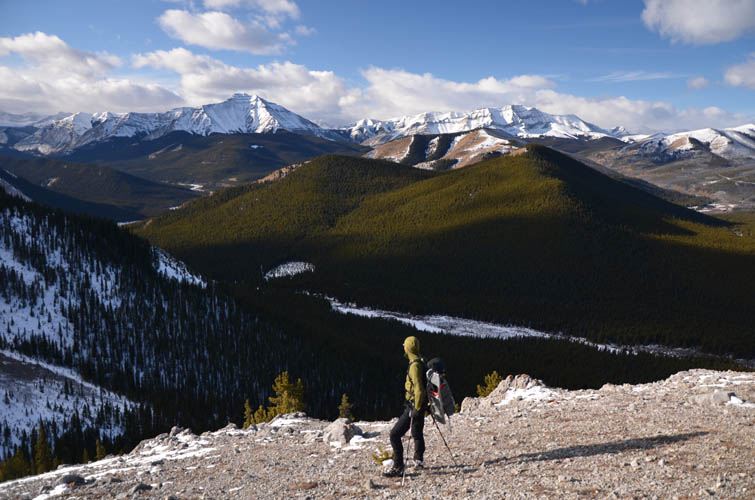
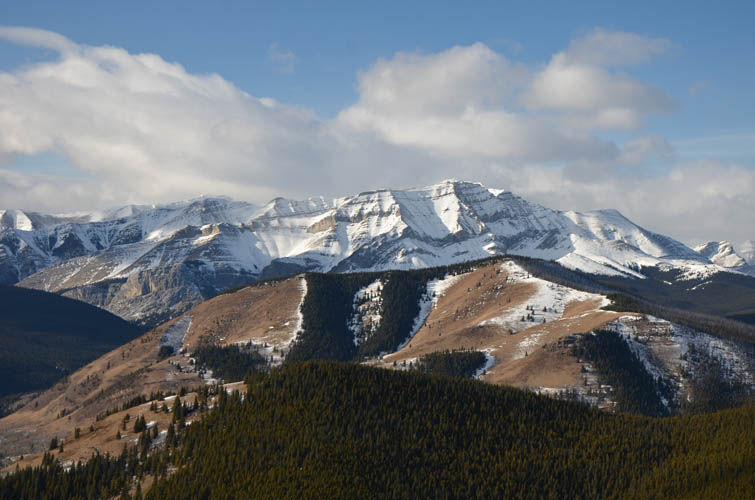
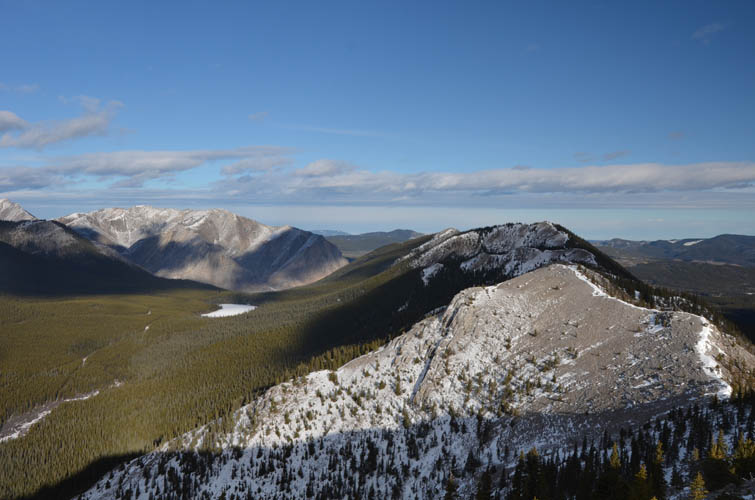
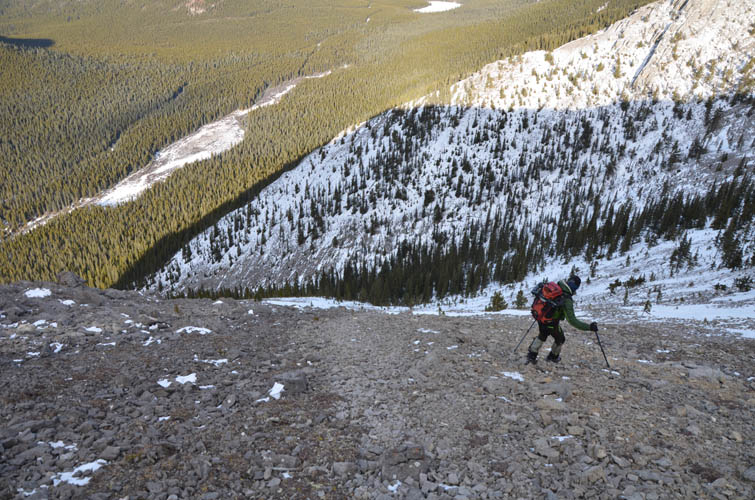
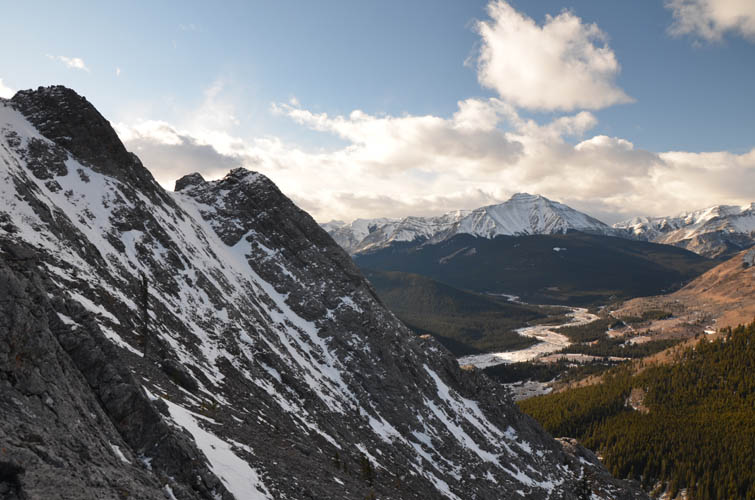
The ridgewalk was thoroughly enjoyable. There were numerous ups and downs, a lot more than we had expected, but the terrain was gentle (no scrambling required) and we were treated to wonderful views along almost the entire length of the ridge. The characteristic shape of Dormer Mountain forms a major landmark on the horizon, flanked by the equally imposing Barrier Mountain to the north. In between, the lovely valley below us features grassy meadows, deep green forest, and gently rolling hills. We had brought our snowshoes, but didn’t need them even in the few stretches of calf- to knee-deep snow where the ridge top is treed. An impressively tall cairn on the northern high point of the ridge came as a bit of a surprise to us, while the true summit at 2109 m in the middle of the ridge only has a sad-looking pile of rocks to show for. Several other intermediate bumps followed; I think we counted six or seven high points in total.
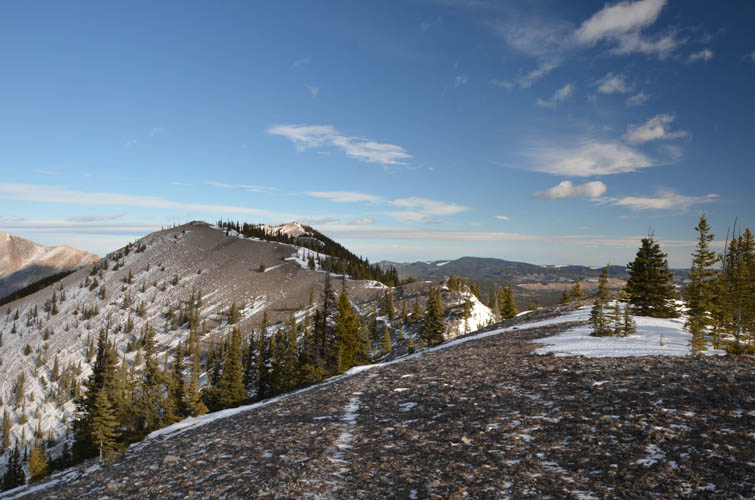
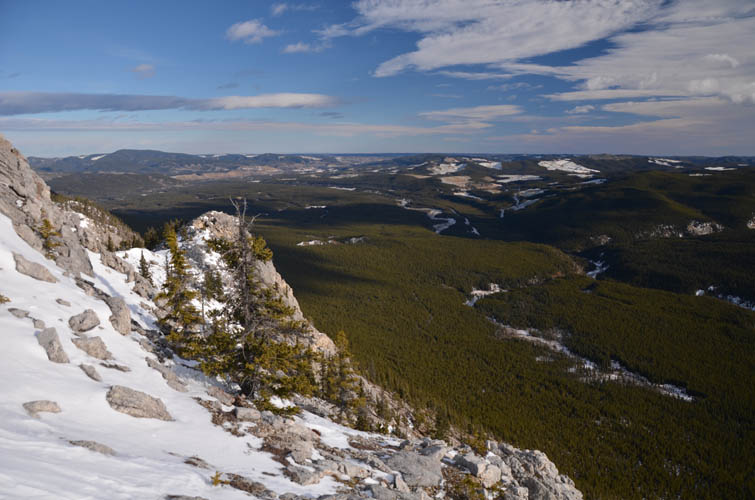
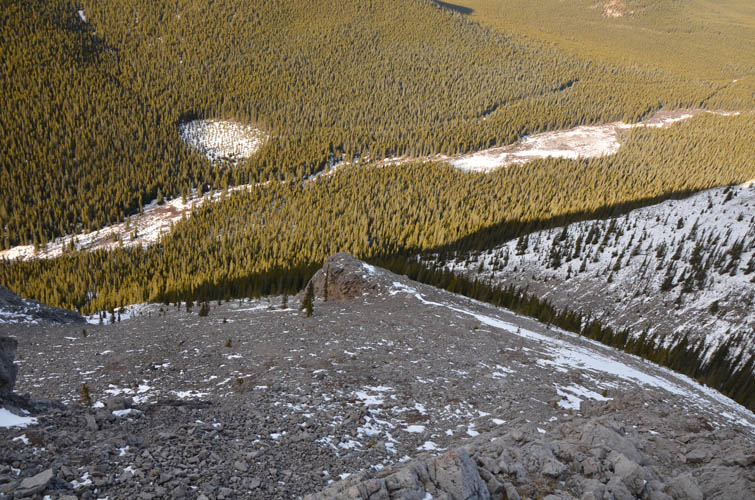
Towards the southwestern end the ridge narrows and the west side steepens considerably. We thought about traversing all the way to the end of the ridge, but then Trevor and Richard spotted a great descent route down one of the open ribs that extend downwards to the valley. There was barely any snow on this slope and the rubble was pretty much frozen together. Only in the lowermost part when we got back into the trees did it get quite slippery. In retrospect, it might be better to do this loop in an anti-clockwise direction so you have the steep rubble slope on the way up and forest on the way down. On the other hand the views might not be quite as nice then.
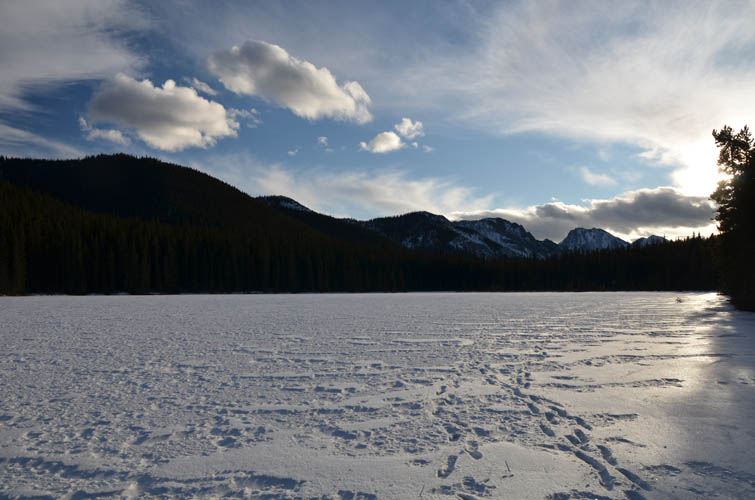
A flat area of bushes and tall grass covers sections of the valley between Minos and The Diamond. An easier way to traverse the valley is an old well site road and seismic lines that run parallel to the grassy areas. Luckily, a group of seven or eight hunters on horses we ran into had beaten the trail for us, which made the hike a lot more comfortable. We took a short detour to the small lake that sits at the highest point of the valley. It was completely frozen over and just a joy to walk and slide across!
The river crossing wasn’t any less painful on the way back (at least for Richard and me). Still, despite getting our feet wet we all agreed this was a great ridgewalk and a good workout that’s perfect for this time of the year.
Note: Crossing the Red Deer River in spring/summer can be dangerous because of high water levels and strong currents.
For a detailed map of the area, including all existing trails and many possible scramble routes, see the Ya Ha Tinda & Surroundings Trail Map on Avenza (a free mapping app for offline navigation and tracking). The map is also available in print at MapTown or GearTrade.
|
Elevation: |
2109 m (my GPS) |
|
Elevation gain: |
1180 m |
|
Time: |
7.5 h |
|
Distance: |
15.0 km |
|
Difficulty level: |
Easy (Kane), T3 (SAC) |
|
Comments: |
Involves crossing the Red Deer River. |
|
Reference: |
Own route finding |
|
Personal rating: |
4 (out of 5) |
NOTE: This GPX track is for personal use only. Commercial use/re-use or publication of this track on printed or digital media including but not limited to platforms, apps and websites such as AllTrails, Gaia, and OSM, requires written permission.
DISCLAIMER: Use at your own risk for general guidance only! Do not follow this GPX track blindly but use your own judgement in assessing terrain and choosing the safest route. Please read the full disclaimer here.