1 August 2016
With Trevor & Richard
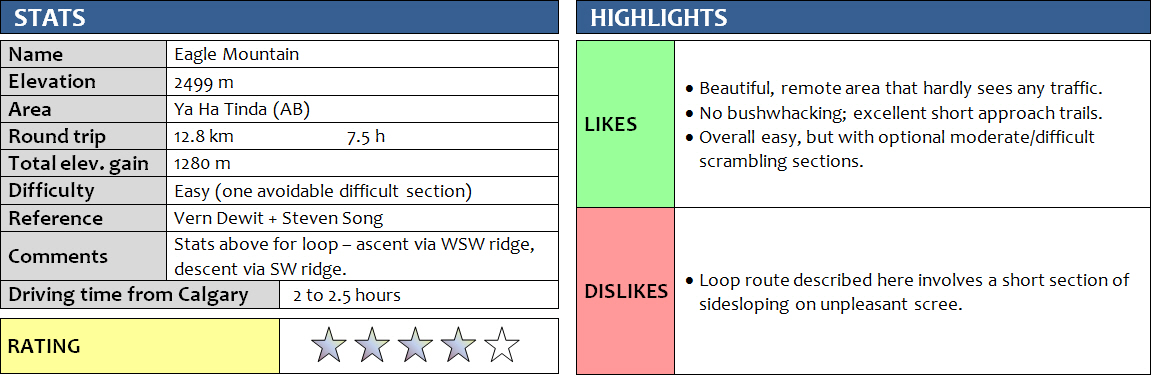
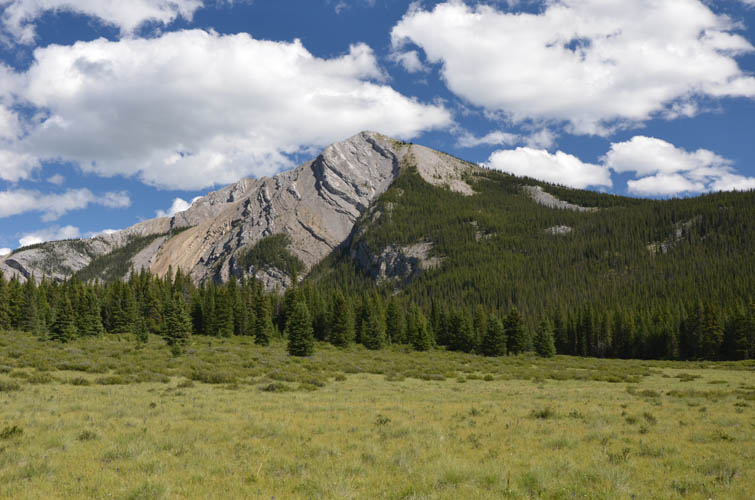
Like neighboring Maze Peak, Eagle Mountain is a perfect introduction to the beautiful Ya Ha Tinda area west of Sundre. The trailhead is easy to find (Eagle Lake parking lot), there’s a very good approach trail, and the mountain itself is hardly more than a strenuous hike, interspersed higher up with a few sections of moderate and/or difficult scrambling, all of which can be avoided if you so desire. And on top of that, the hike grants very nice views of the expansive green meadows of the Ya Ha Tinda ranch below. Trevor and Richard had never been to the area, so when we were looking for an easy objective that also avoided the craziness of long weekend traffic, Eagle Mountain certainly fit the bill!
Our hike started on an easy-to-follow but muddy horse trail right from the parking lot. After a small creek crossing, we came to a wooden sign where we headed north in the direction of “Scalp Creek”. After a short hike in the forest, we turned right to another, smaller trail (orange flagging) and after some 5 minutes we then left the trail and simply went straight up the broad ridge through light forest. The angle gradually steepened and we were soon huffing and puffing. Trevor, who set off like a rocket in his usual speedy approach, left Richard and me in the dust… breathless and quietly hoping that he would finally stop for a sip of water and take a break!
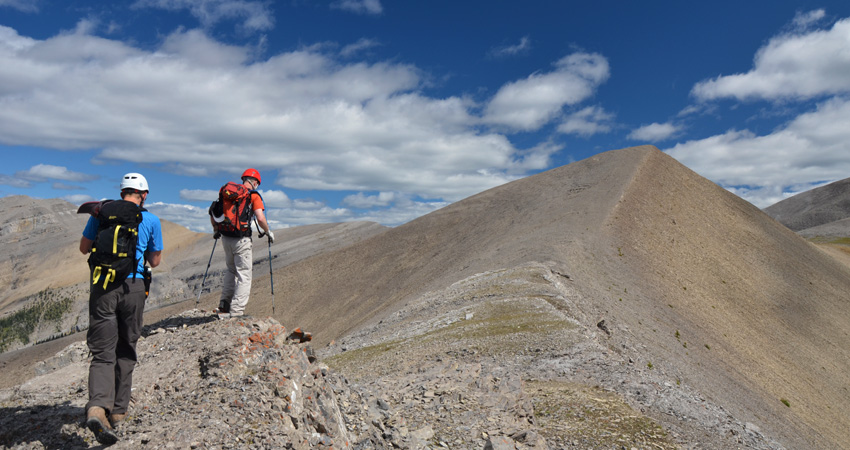
We made very good progress as the terrain is easy to negotiate (light forest followed by partially grass-covered firm scree) and the weather was perfect for hiking – a pleasant 20 degrees with a balmy breeze. Although there is no trail, it’s impossible to get lost as you simply follow the crest of the ridge all the way to a false summit. Soon after, we reached the optional crux which I awkwardly downclimbed: it’s a 4-5 m high vertical cliff with good holds in the upper 2/3, but the lowermost bit has poor holds and the rock is loose – several pieces actually crumbled away as I tested them. I would therefore not recommend scrambling the crux at all. Richard and Trevor were smarter (and faster) than me and simply backtracked a bit and went around climber’s left. A few more short steps of easy to moderate scrambling followed, but the rest was simply a trudge up broad piles of rock all the way to the summit – with one annoying intervening bump of brown shale requiring additional elevation gain and loss.
That “bump”, nonetheless, was quite fascinating for the fact that there were some fossil-rich beds about half way up with very well preserved examples of shells (bivalves, brachiopods), crinoids (sea lilies), gastropods (snails) and other marine life. I don’t know what the age or formation of this layer of rock is, but it’s certainly interesting to look at. Poor Richard, who has zero interest in fossils, had to wait again as Trevor and I got sidetracked and excitedly searched for samples for a good 20 minutes here.
From the summit, we enjoyed fabulous views over the broad meadows of the Ya Ha Tinda ranch, surrounded by a range of peaks now all familiar to me, including Warden Rock, Wapiti Mountain, and Scalp Peak to name but a few. Poplar Peak (Rum Ridge) is further to the north along the same massif, but the ridge walk connecting Eagle Mountain to Poplar appears as if it could be quite a lengthy affair. To the south, Maze Peak looks rather impressive and certainly more involved than it actually is – just an easy scramble.
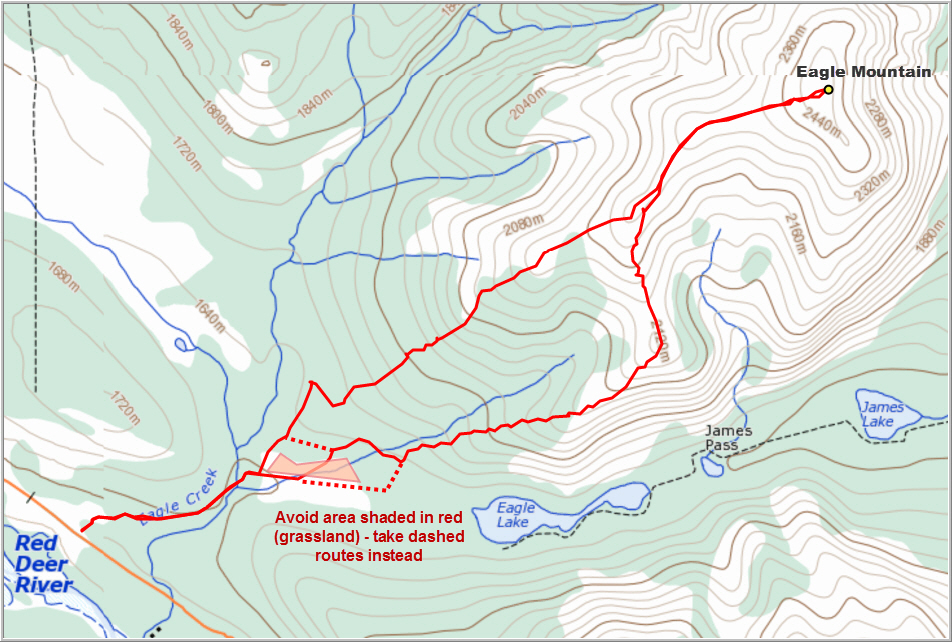
On return, we opted to try out the SW ridge, making a small loop out of our route today. We first descended back over the brown shale bump and then veered skier’s left, just before the vertical cliff (crux), sidesloping around this false summit block on scree ledges. It was a bit awkward to traverse as the rock was loose in places, but after 20 minutes or so we reached the south side of the block to connect with the SW ridge. There was a small high point to ascend first, followed by a short, vertical cliff similar in appearance to the crux on our ascent route, but much more straightforward to climb (very good holds here; a moderate scramble). For a much easier alternative, it looked like you could also just hike around it on skier’s left. The remainder of the descent was an easygoing ridge hike, partially on a faint trail, and again through light and mossy forest on the lower slopes. Down in the valley we hooked on to the Eagle Lake trail via a broad grassy plain. Note that a sign on the other side of that plain (it was pointed backward to us) advises visitors to stay off the grass, presumably as this is an environmentally sensitive and particularly fragile area. So if you chose to do the loop route just follow one of the intervening horse trails when you arrive near the valley, instead of crossing the meadow. The area to avoid is highlighted on my map below.
This was a wonderful outing in a very charming area. It involved lots of steep hiking and we certainly had to work for this one, but the terrain is gentle and there’s the added bonus of optional scrambling sections.
For a detailed map of the area, including all existing trails and many possible scramble routes, see the Ya Ha Tinda & Surroundings Trail Map on Avenza (a free mapping app for offline navigation and tracking). The map is also available in print at MapTown or GearTrade.
DISCLAIMER: Use at your own risk for general guidance only! Do not follow this GPX track blindly but use your own judgement in assessing terrain and choosing the safest route. Please read the full disclaimer here.
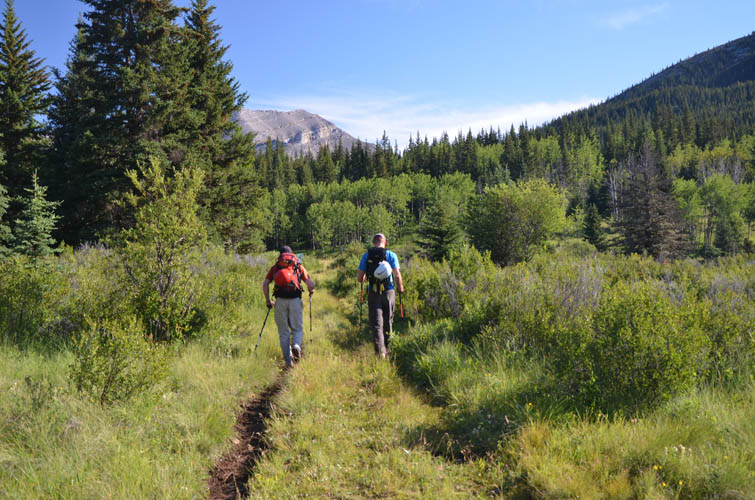
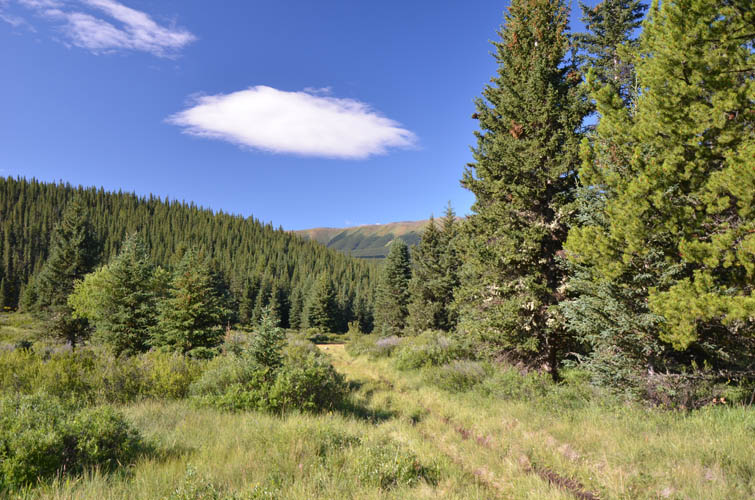
Starting out on the well-trodden Eagle Lake trail.
It’s a gorgeous day! The weather was perfect when we did our hike, but Eagle Mountain can often be done throughout the year including the winter months.

Hiking up steep slopes through light forest at the beginning.
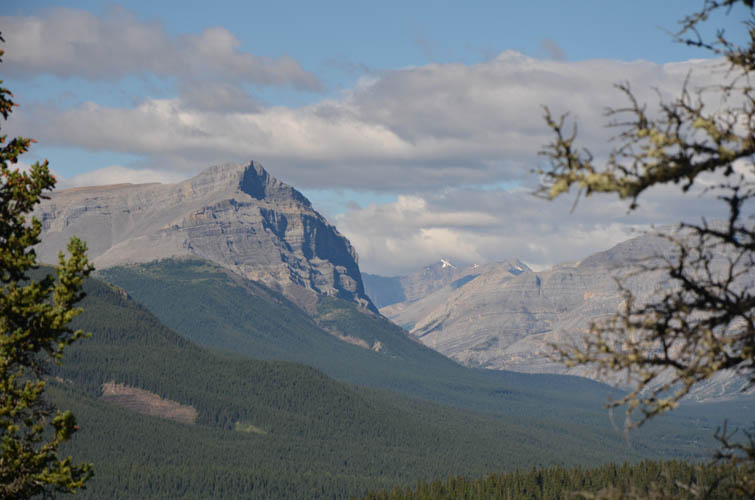
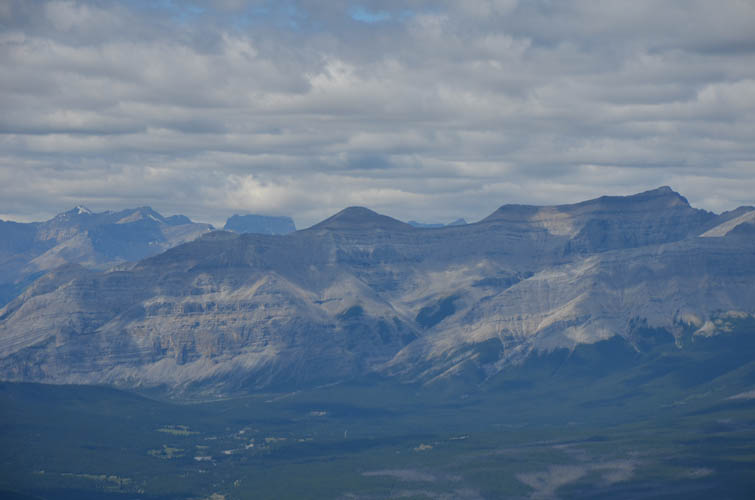
The characteristic shape of Warden Rock, which marks the boundary to Banff National Park.
We are already higher than Labyrinth Mountain. You can see from here that this grandly named mountain is more of a lowly treed hump.
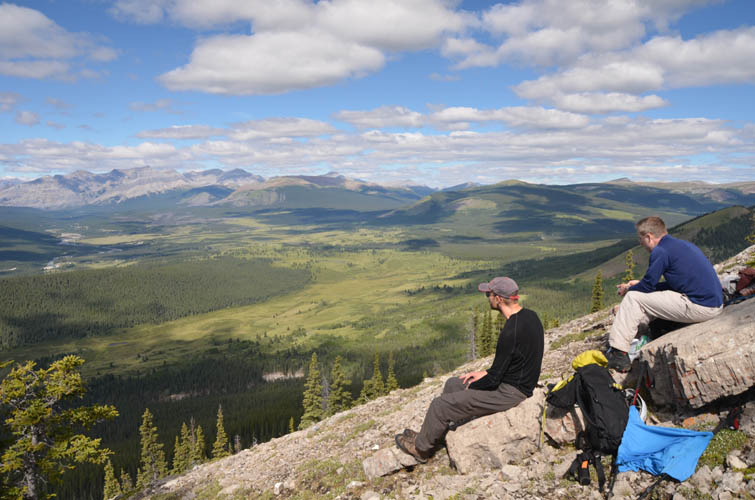
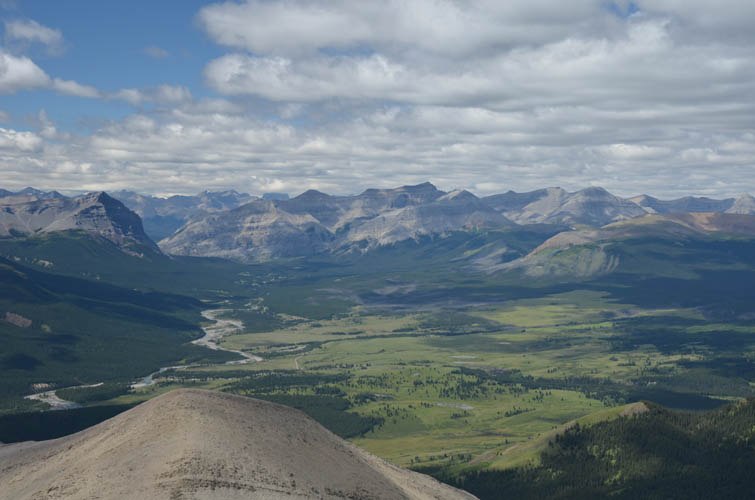
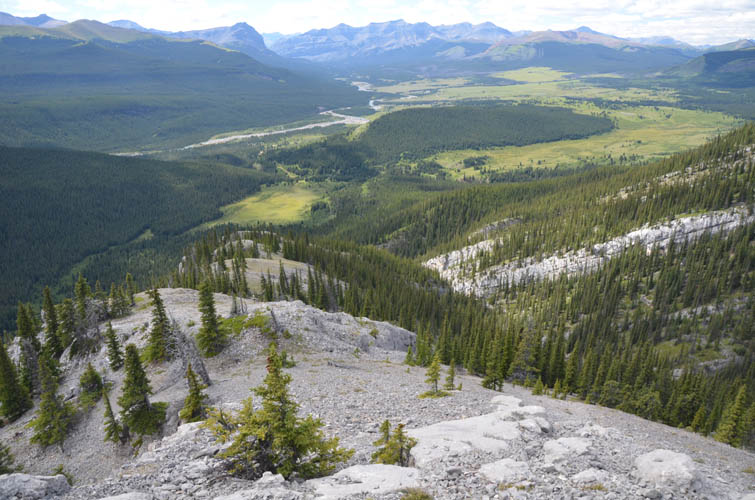
Taking in the views over the Ya Ha Tinda ranchlands below us.

Just above treeline, we reach the first false summit – one of many!
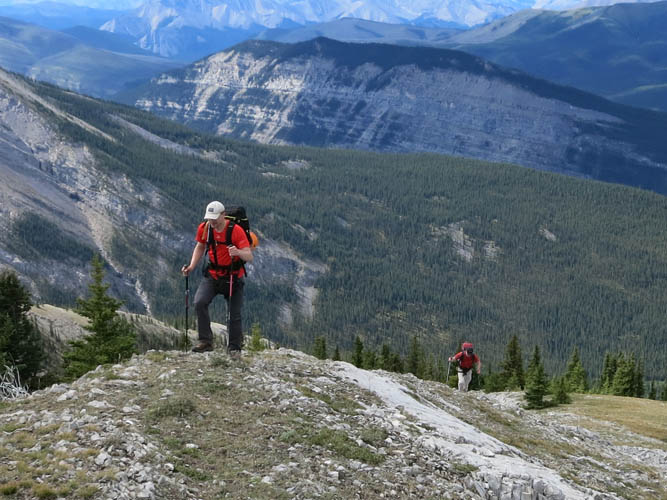
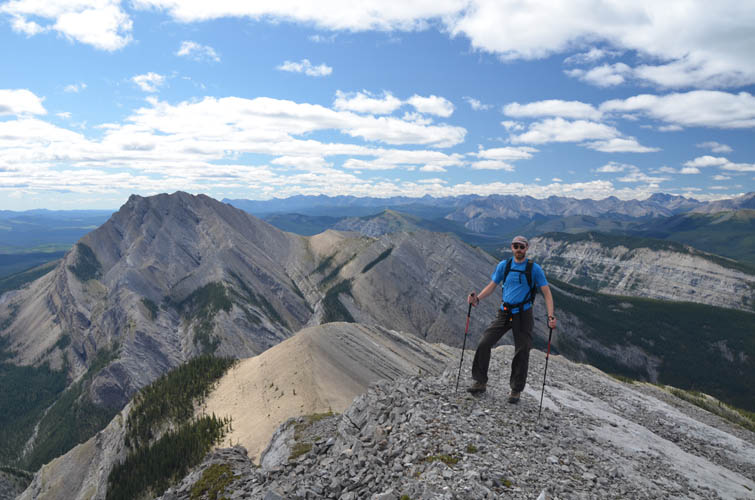
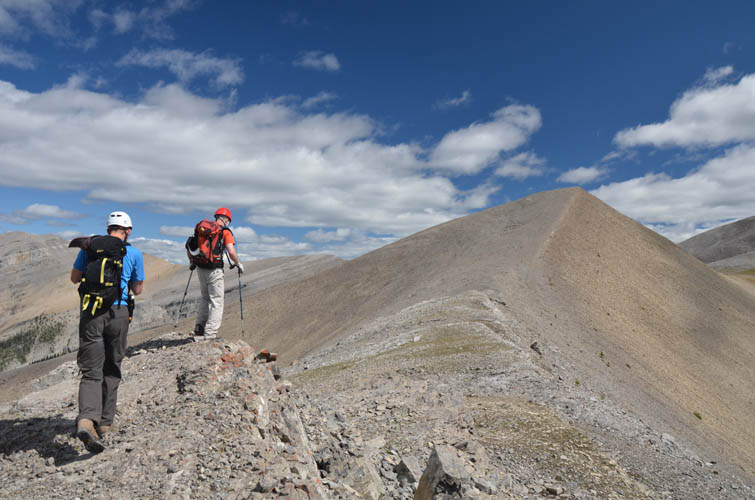
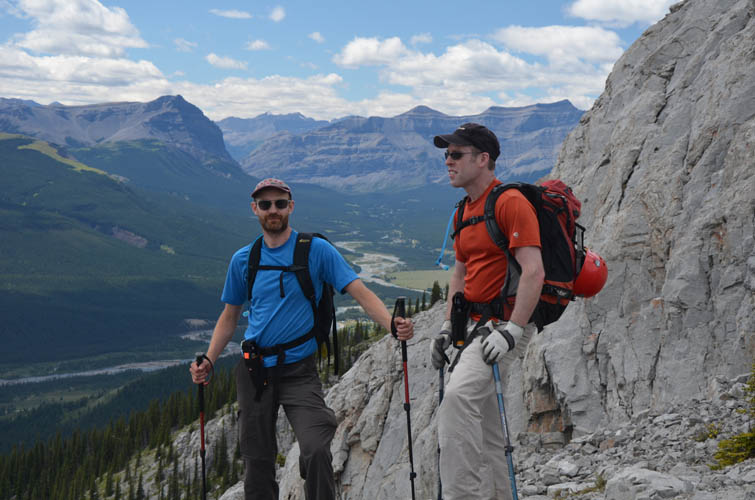
Richard took this shot of Trevor and me coming up the broad ridge. Labyrinth Mountain the background.
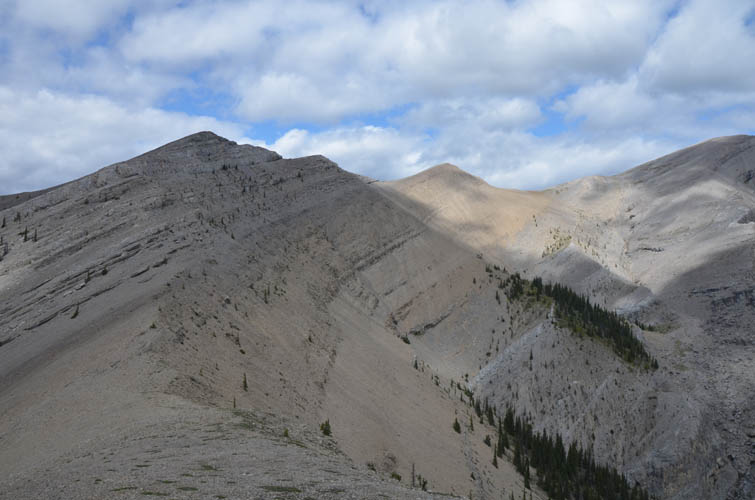
Two more false summits show up: the ridge leads up the grey slabby highpoint in the centre and then over the brown shale “bump” to the left before heading up to the true summit, which is out of sight.
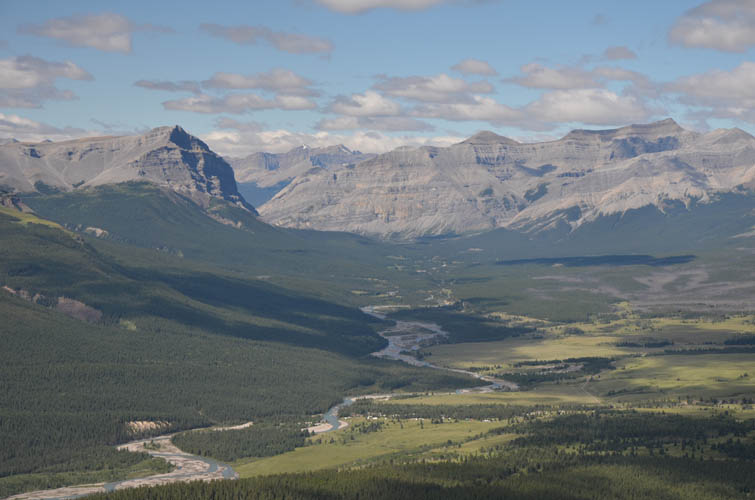
Gorgeous views of the Red Deer River in the valley below. Warden Rock on the left, Wapiti Mountain on the right.
Richard coming up the ridge.
The perfect place for a pose, with Maze Peak (left) and Labyrinth Mountain forming the backdrop.
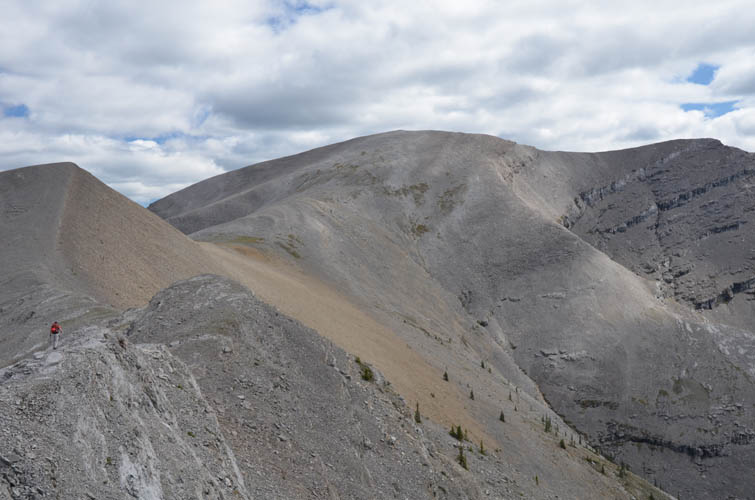
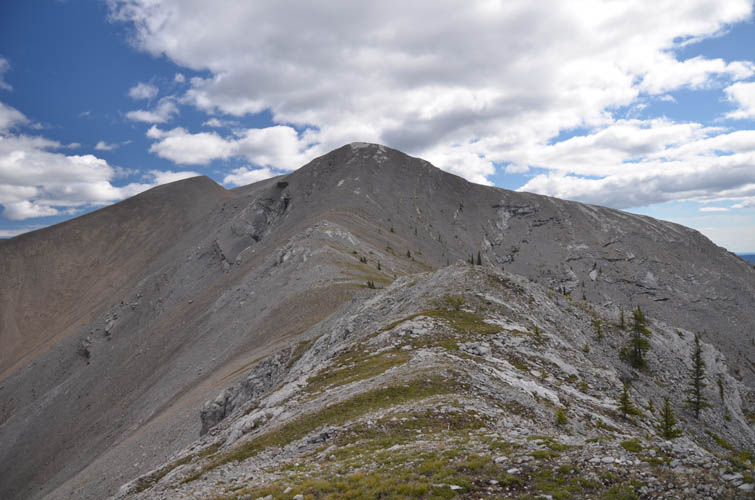
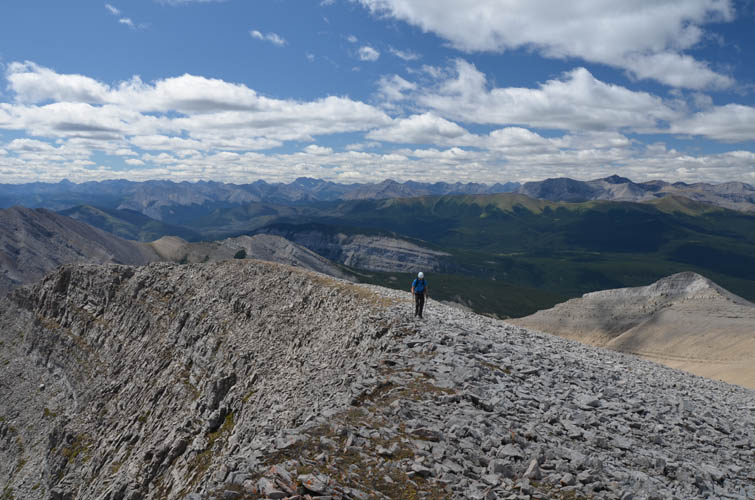
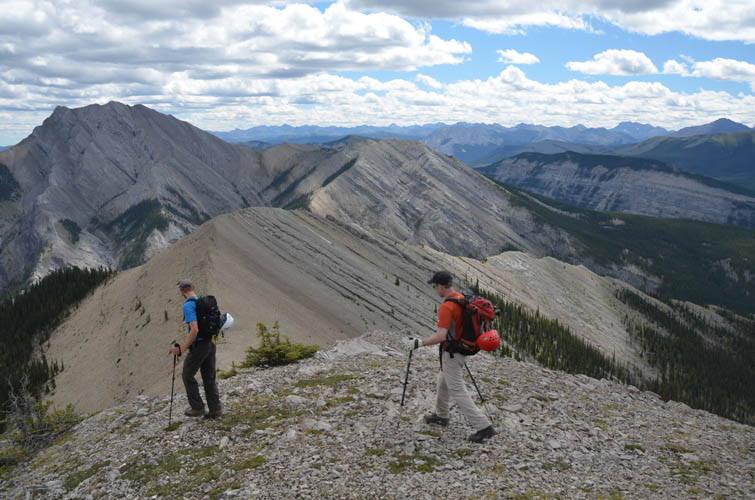
It’s still quite a distance to the true summit – the broad rise in the centre.
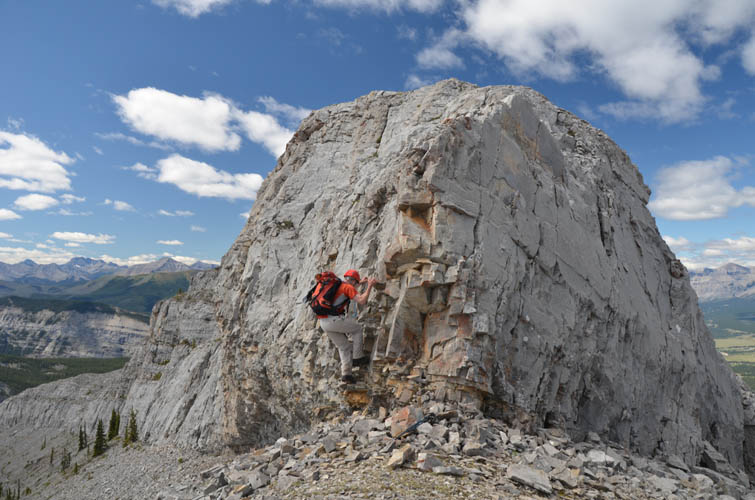
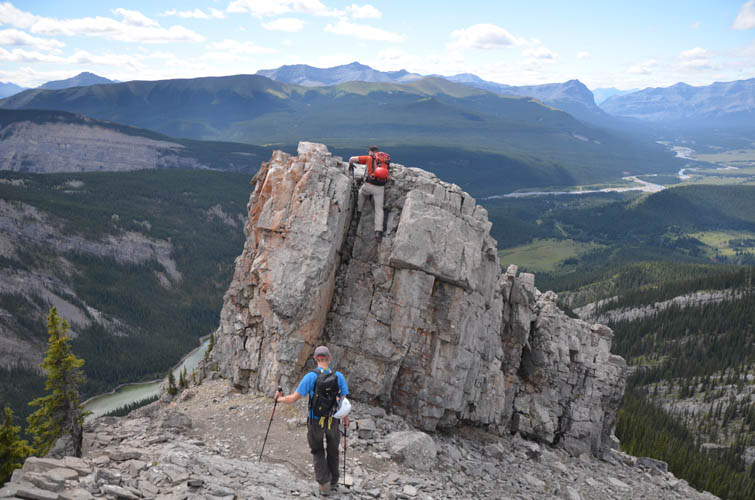
Looking back at the optional crux: Trevor gives it a go, but you can see how the rock in the lowermost part has been crumbling away. Better to avoid this unstable cliff and bypass it around on the right in this picture (on descent).
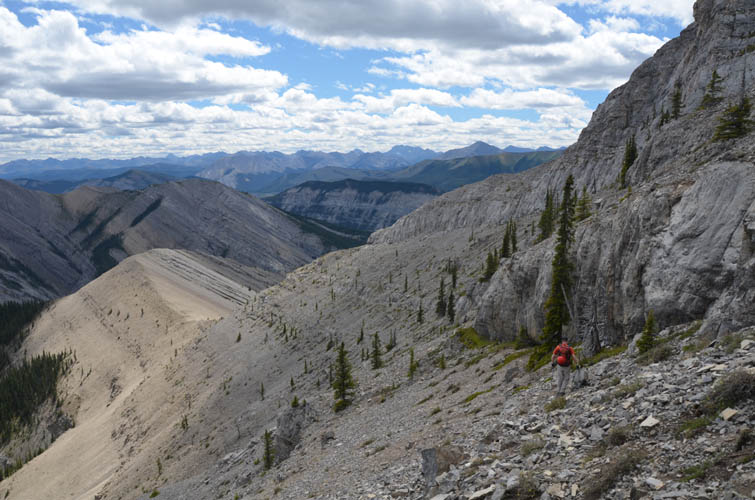
There are numerous smaller cliffs and steps, all of which are easy to negotiate.
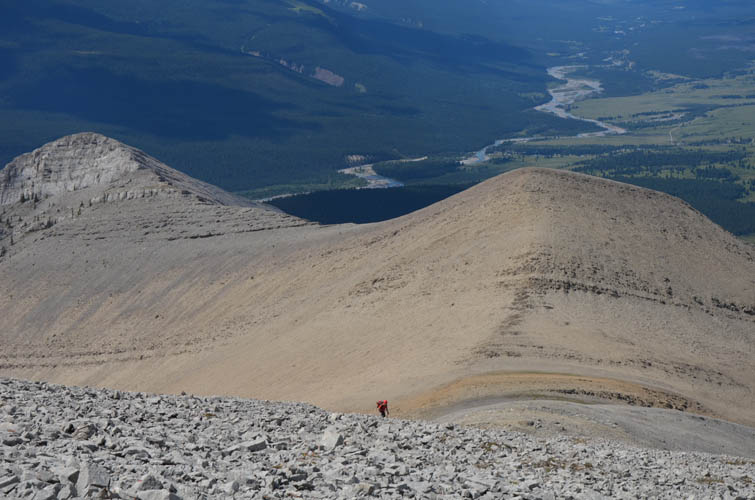
The brown shale bump just before the summit.
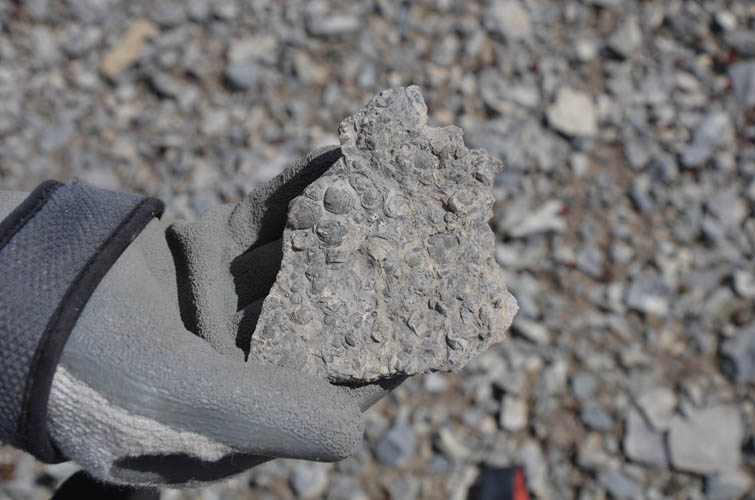
We come across layers of fossil-rich beds on the way up the bump. This sample is full of bivalves and brachiopods.
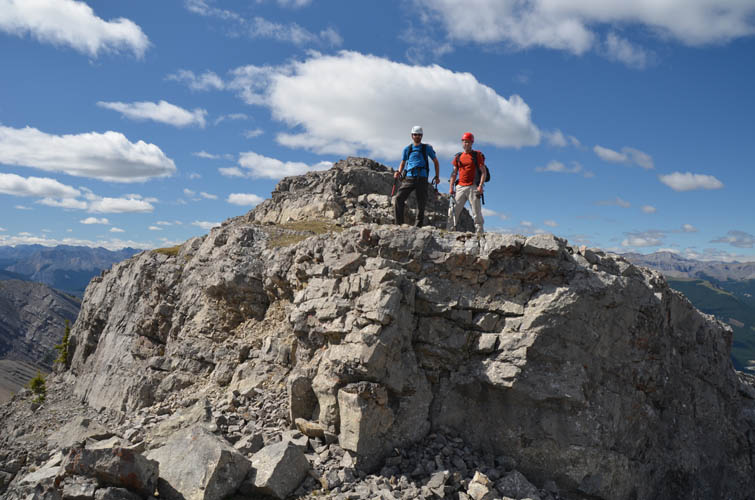
Final steps to the broad summit.
Trevor spent too much time identifying fossils and is now catching up!
Summit views to the west.
Close-up of Wapiti Mountain, which I ascended a week earlier. The summit is the highpoint on the right. The giant dark grey mountain in the back on the left, partially shrouded in clouds, might be Cataract Peak.
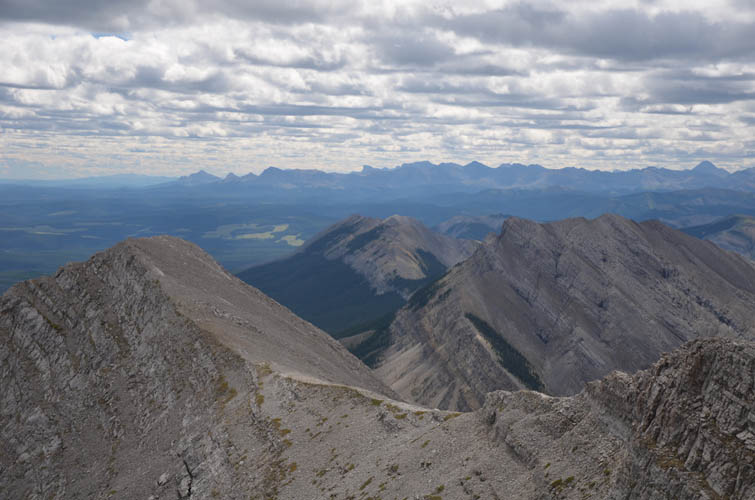
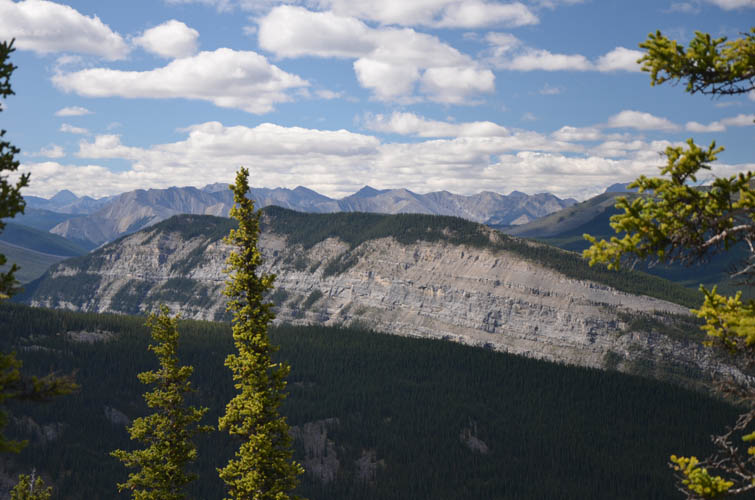
Looking south along the very edge of the Rockies.

Maze Peak lies immediately to the south.
On the way down, we turn left at these cliff bands (which also contain the crux), traversing to the SW ridge along scree ledges below one of the main cliffs.
Trevor leading the way along the ledge. It’s an easy traverse, but the slidesloping on unstable scree is not exactly enjoyable.
Traverse done – time for a photo shoot!
Heading south to the SW ridge, our alternative descent route to make this trip a loop.
Looking back at the ledge traverse. It appears steeper than it really is. The summit of Eagle is on the far right.

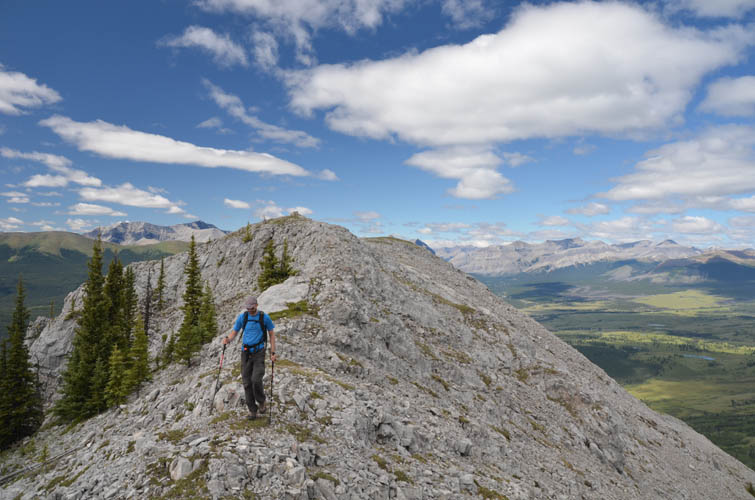
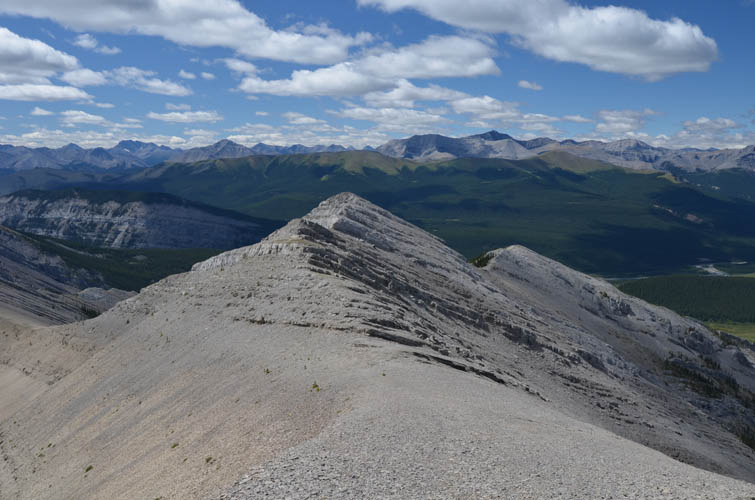
Similar terrain awaits on the SW ridge.
The “crux” here is a 5 m cliff, which can be scrambled on good holds via a chimney.

Looking back along the SW ridge.
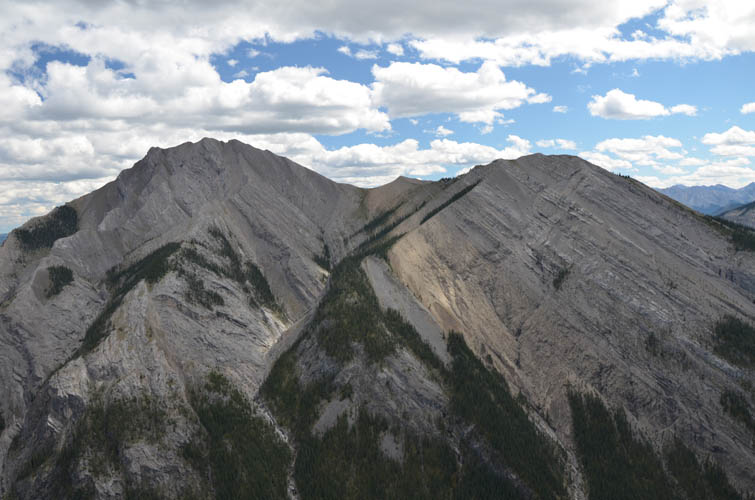
Another view of Maze Peak and its NW ridge.
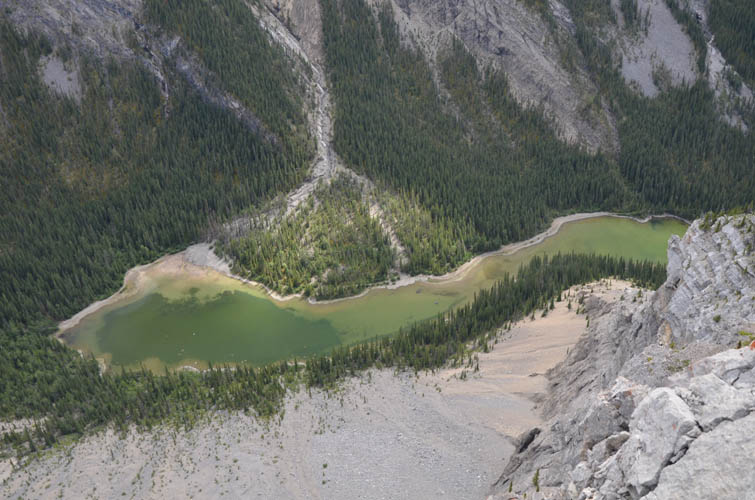
Eagle Lake is tucked away between Maze Peak and Eagle Mountain.
Much of the ridge is an enjoyable and easy hike.

Soft moss in the forest makes it easy on the knees.
A look back at Maze Peak from the grassy plain near Eagle Lake trail.